初时微服务 在了解Kubernetes之前,我们需要先认识什么是微服务,并且它与传统的单体式架构的区别以及优劣处。
微服务它是将一个庞大的应用系统拆分成为多个小块的独立服务,再把这些独立的小块服务进行串联起来的一种架构设计,它是具有比传统架构:内聚更强,更加敏捷。
类似于蜂巢,将多个不同的服务聚合为一个功能强大的应用服务。
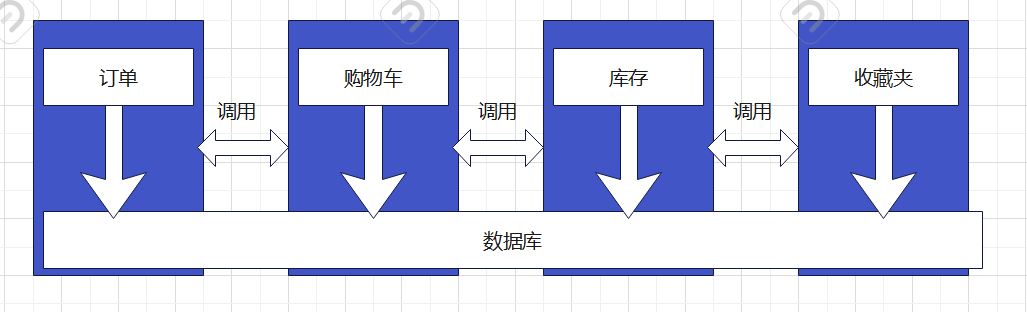
基于微服务的系统架构 微服务的核心思路就是拆分。将单体项目的问题,通过把项目拆分为一个个小项目,如下图:
传统单体架构VS微服务架构 例如一个电商系统,电商系统中具备着很多功能,比如:登录、人员账号、商品库存、订单、购物车等等,随着业务功能的迭代,项目的业务越来越复杂,开发人员越来越多,相应的开发、编译、部署、水平扩展等都会受到不同程度的限制。
传统架构中,你商城系统中所有的前端后端,以及所有的服务都部署在一台服务器上,那么这台服务器的性能要求就会随着你的业务复杂度,以及客户访问量急剧增加。如果系统中要对收藏功能进行更新,那么你需要提前发布公告对客户说明凌晨几点到早上几点将停机维护升级,这不光是对客户的体验感极度下降,同时我们的开发、运维等人员还要通宵达旦的对系统进行升级。
而在微服务架构中,它将功能拆分成多个不同的组件,一个功能对应一个组件,你的前端和后端是分离的,你的登录、人员账号、库存等等功能都是每个不同的组件,它们是秒级分别部署在不同的容器中,当你需要对收藏功能进行升级时,你只需要发布在某一时间段收藏夹功能暂不可用,但不会影响到你其他的业务,并且他的部署是秒级的,客户根本感受不到升级带来的影响,最有可能的也就是在的升级的同一秒,客户点击了这个功能,下一秒又恢复了,客户都只会认为是自己网络当时卡了一下。
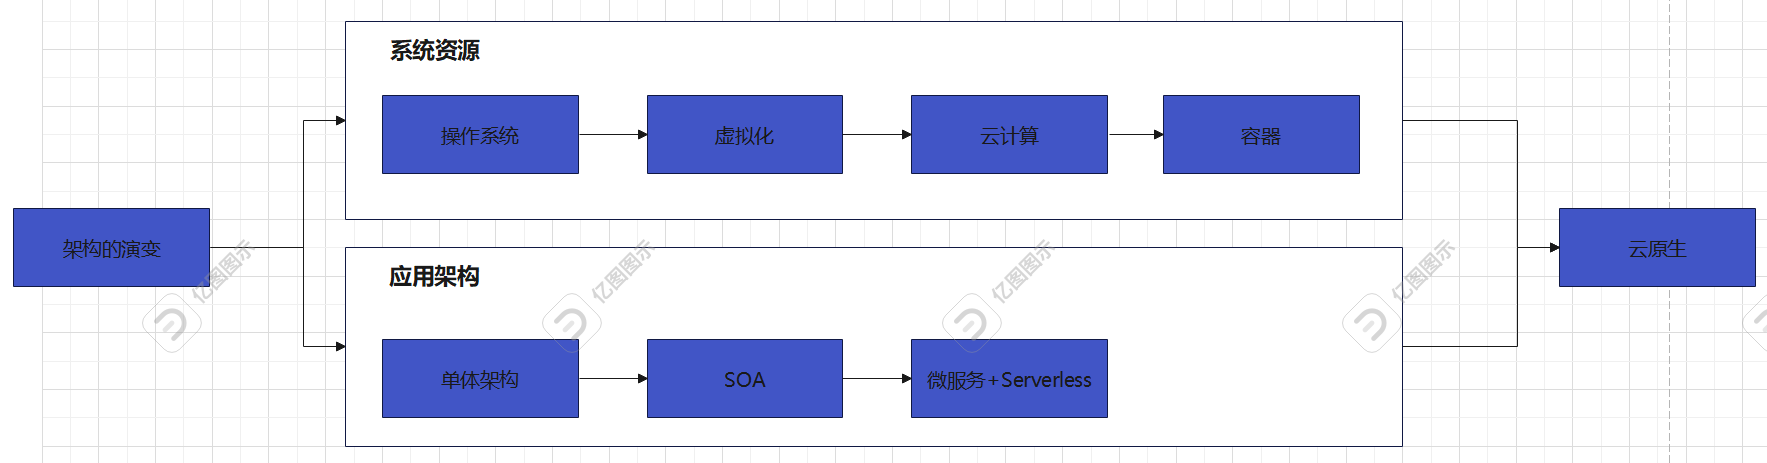
下图是应用架构是发展史。
单体架构
微服务架构
迭代速度
较慢
快
部署频率
较慢不经常部署,部署风险高
经常发布,部署风险小
系统性能
吞吐量小
吞吐量大
系统扩展
扩展性差
扩展性强
技术栈多样性
单一、封闭
多样、开放
运维
简单
运维复杂
部署
容易部署
较难部署
架构复杂度
复杂度不高
复杂度高
查错
简单
定位问题困难
管理成本
主要用于开发成本
服务治理、运维
容器介绍 容器是一个可以将应用程序以指定格式打包并运行在一个操作系统相关联的环境种的方法,和虚拟机不同的是,容器并不会打包整个操作系统,而只打包允许该应用程序所必须的库和依赖设置等,这将使得容器具备高效率、轻量化、系统隔离性,以上特性将会确保无论在何处部署,容器内允许的应用都会保持完全一致,不会出现所谓的开发在他的环境没问题,但是到生产怎么就出现一堆异常的情况。
主流容器工具:Container、Docker、Podman……..
传统应用部署痛点 在传统应用部署中,我们经常会遇到以下问题:
环境不一致:导致开发环境中是没问题,但是应用到生产中可能会出现一堆奇奇怪怪的问题。
依赖管理复杂:例如该服务器上你将部署你的两类应用,应用一可能需要jdk1.6,应用二可能需要JDK1.8,这就导致一台服务器上两个应用需要的依赖版本不同,导致管理复杂,问题频出的情况。
资源利用率低:传统服务器或虚机需要一套完整的操作系统,占用大量的磁盘及内存等资源,但你的应用并不是每时每刻都需要着这么大的资源,这就导致资源大量时间处于空闲浪费状态。
部署复杂:部署多套应用时,每套应用你可能需要重复的手动部署虚机、配置环境、安装依赖等,花费时间长效率低切易出错。
容器化技术解决方案 容器化技术通过以下方式解决以上传统部署的通点:
环境标准化:将开发环境中的最小操作系统及依赖等打包在一起,确保在任何一个环境中都能一致的运行。
轻量级:容器共享宿主机的操作系统内核及资源,比虚机机更轻量。
快速部署:容器可以在几秒内启动,大大提高部署、升级、重启效率,相对传统部署中的升级就是一次大型手术风险,容器化容错率和效率更为高效。
可移植:构建一次容器镜像,到处可运行。
容器化的核心理念 容器化遵循“不氪变基础设施”的理念:
应用和环境被打包成不可变的镜像
每次部署都使用相同的镜像
配置通过环境变量或配置文件注入
问题修复通过重构镜像而非修改运行中的容器
Docker的核心概念 镜像(image)
定义 :镜像是一个只读的模板,包含了运行应用所需的所有内容:代码、运行时、库文件、环境变量和配置文件。
特点 :
分层存储 :镜像由多个层组成,每一层代表一次修改。只读性 :镜像本身是只读的,不能直接修改。可复用 :同一个镜像可以创建多个容器。版本管理 :通过标签(tag)进行版本管理
类似与镜像就是一个安装程序或模板,它定义了应用运行的所需的一切,但本身是不可直接运行的。
容器(container)
定义 :容器是镜像的运行实力,是一个轻量级、可移植的执行环境。
特点 :
隔离性 :每个容器都有自己的文件系统、网络和进程。临时性 :容器可以被创建、启动、停止、删除。可写层 :容器在镜像基础上添加了可写层。进程级 :容器内通常运行一个主进程。
仓库(Repository)
定义 :仓库是存储和分发镜像的地方,可以包含一个镜像的多个版本。
分类 :
公共仓库 :如 Docker Hub,任何人都可以使用私有仓库 :企业内部搭建,用于存储私有镜像官方仓库 :由软件官方维护的镜像仓库
离线部署docker
操作系统
Red Hat Enterprise Linux release 9.4 (Plow)
Docker版本 28.2.2
Docker离线安装包下载地址:https://download.docker.com/linux/static/stable/x86_64/
阿里云rpm安装包下载地址:https://developer.aliyun.com/mirror/?spm=a2c6h.25603864.0.0.5d256733vSKLL6
在虚拟机中创建安装包存放目录,之后利用工具将安装包上传到该目录下:
1
2
3
4
5
6
7
[root@localhost softapp]# mkdir -p /opt/softapp/ [root@localhost softapp]# tree /opt/ /opt/ └── softapp └── docker-28.2.2.tgz 1 directory, 1 file
解压docker安装包,会产生docker的一个新目录,新目录内包含以下文件:
1
2
3
4
5
6
7
8
9
10
11
12
13
14
15
16
17
18
19
20
21
22
[root@localhost softapp]# tar -zxvf /opt/softapp/docker-28.2.2.tgz -C /opt/softapp/ docker/ docker/containerd-shim-runc-v2 docker/containerd docker/docker docker/runc docker/ctr docker/dockerd docker/docker-init docker/docker-proxy [root@localhost softapp]# tree /opt/softapp/docker /opt/softapp/docker ├── containerd ├── containerd-shim-runc-v2 ├── ctr ├── docker ├── dockerd ├── docker-init ├── docker-proxy └── runc 0 directories, 8 files
将解压出来的文件拷贝到/usr/bin工作目录下
1 [root@localhost softapp]# cp /opt/softapp/docker/* /usr/bin/
由于此刻docker未加入systemd守护进程,所以此刻利用cat重定向将docker加入守护进程,并做开机自启:
1
2
3
4
5
6
7
8
9
10
11
12
13
14
15
16
17
18
19
20
21
22
23
24
25
26
27
28
29
30
31
32
33
34
35
[root@localhost system]# cat > /etc/systemd/system/docker.service << EOF [Unit] Description=Docker Application Container Engine Documentation=https://docs.docker.com After=network-online.target firewalld.service Wants=network-online.target [Service] Type=notify # the default is not to use systemd for cgroups because the delegate issues still # exists and systemd currently does not support the cgroup feature set required # for containers run by docker ExecStart=/usr/bin/dockerd -H unix:///var/run/docker.sock --selinux-enabled=false --default-ulimit nofile=65536:65536 ExecReload=/bin/kill -s HUP $MAINPID # Having non-zero Limit*s causes performance problems due to accounting overhead # in the kernel. We recommend using cgroups to do container-local accounting. LimitNOFILE=infinity LimitNPROC=infinity LimitCORE=infinity # Uncomment TasksMax if your systemd version supports it. # Only systemd 226 and above support this version. #TasksMax=infinity TimeoutStartSec=0 # set delegate yes so that systemd does not reset the cgroups of docker containers Delegate=yes # kill only the docker process, not all processes in the cgroup KillMode=process # restart the docker process if it exits prematurely Restart=on-failure StartLimitBurst=3 StartLimitInterval=60s [Install] WantedBy=multi-user.target EOF
为文件添加执行权限,并重载守护进程,将docker添加开机自启动:
1
2
3
4
[root@localhost system]# chmod +x /etc/systemd/system/docker.service [root@localhost system]# systemctl daemon-reload [root@localhost system]# systemctl enable --now docker.service
验证docker是否安装及启动成功,并且版本核对:
1
2
3
4
5
6
7
[root@localhost system]# systemctl status docker.service ● docker.service - Docker Application Container Engine Loaded: loaded (/etc/systemd/system/docker.service; enabled; preset: disabled) Active: active (running) since Mon 2025-06-16 15:49:25 CST; 57min ago ....忽略.... [root@localhost system]# docker --version Docker version 28.2.2, build e6534b4
由于dockerHab镜像都位于国外,国内无法直接拉取官网的镜像仓库,所以我们需要配置一个国内的加速器,也就是镜像仓库地址:
1
2
3
4
5
6
7
8
9
[root@localhost opt]# mkdir -p /etc/docker [root@localhost opt]# cat > /etc/docker/daemon.json << EOF { "registry-mirrors": [ "https://docker.m.daocloud.io" ] } EOF
配置docker命令补全功能,在配置该功能前需先检查您的服务器是否具有bash-completion软件包,如有则跳过安装bash-completion步骤,如没有请先安装bash-completion软件包:
bash-completion下载地址 :https://developer.aliyun.com/mirror/?spm=a2c6h.25603864.0.0.5d256733vSKLL6
1 2 rpm -ivh /opt/softapp/bash-completion-2.11-4.el9.noarch.rpm
1 2 3 4 5 6 7 8 9 10 11 12 [root@localhost ~]# cat <<EOT >> ~/.bashrc if [ -f /etc/bash_completion ]; then . /etc/bash_completion fi EOT [root@localhost ~]# mkdir -p ~/.local/share/bash-completion/completions [root@localhost ~]# docker completion bash > ~/.local/share/bash-completion/completions/docker [root@localhost ~]# source ~/.bashrc [root@localhost ~]# reboot
安装完Docker后,我们可以简单的拉取一个镜像来验证某一个地址加速地址是否有效,以及docker功能是否可以正常使用(docker为命令,pull为拉取镜像的选项,docker…/为仓库地址的前缀,nginx为镜像名称,latest为最新的版本号):
1
2
3
4
5
6
7
8
9
10
11
12
[root@localhost system]# docker pull docker.m.daocloud.io/nginx:latest latest: Pulling from nginx dad67da3f26b: Pull complete 3b00567da964: Pull complete 56b81cfa547d: Pull complete 1bc5dc8b475d: Pull complete 979e6233a40a: Pull complete d2a7ba8dbfee: Pull complete 32e44235e1d5: Pull complete Digest: sha256:6784fb0834aa7dbbe12e3d7471e69c290df3e6ba810dc38b34ae33d3c1c05f7d Status: Downloaded newer image for docker.m.daocloud.io/nginx:latest docker.m.daocloud.io/nginx:latest
容器的使用 创建第一个容器 创建一个名字为job-1的容器,基础镜像使用busybox
1 [root@localhost softapp]# docker run --name job-1 docker.m.daocloud.io/library/busybox
参数解析
docker二进制命令。run运行一个容器。--name为容器指定命名。docker.m.daocloud.io/library/busybox指定使用的基础镜像,如果本地镜像存在则直接运行,如不存在则从镜像仓库中拉取后运行
容器创建完成后,可以使用docker命令ps选项查看当前运行的容器,但是此刻我们发现,刚才我们运行了一个名为job-1的容器,并且也成功了,但是我们使用ps查看时未发现容器。
1
2
[root@localhost softapp]# docker ps CONTAINER ID IMAGE COMMAND CREATED STATUS PORTS NAMES
在使用docker ps -a 命令查看所有的容器,此时我们就可以看到刚才我们创建名为job-1的容器了,但是他的状态是Exited停止状态,那是因为容器相当于一个任务,上面的命令要求的是运行一个容器,当他运行完成后,后台进程停止,也没有其他任何进程在运行了,容器也就自然停止了,所以容器他是一个临时性的。
1
2
3
[root@localhost softapp]# docker ps -a CONTAINER ID IMAGE COMMAND CREATED STATUS PORTS NAMES 322d27f38ffd docker.m.daocloud.io/library/busybox "sh" 10 minutes ago Exited (0) 10 minutes ago job-1
创建一个可持续运行的容器 根据上述的实验我们发现容器他是一个临时的,但是在实际业务中,我的服务不可能一启动就停止,那么我们这里就需要来介绍如何运行一个可持续运行的容器。
此时我们运行一个本身就具有可持续后台进程的nginx镜像,运行后发现该容器运行的nginx的进程跑到宿主机前台持续运行中。
1
2
3
4
5
6
7
8
9
10
11
12
13
14
15
16
17
18
19
20
21
[root@localhost softapp]# docker run --name job-2 docker.m.daocloud.io/nginx:latest /docker-entrypoint.sh: /docker-entrypoint.d/ is not empty, will attempt to perform configuration /docker-entrypoint.sh: Looking for shell scripts in /docker-entrypoint.d/ /docker-entrypoint.sh: Launching /docker-entrypoint.d/10-listen-on-ipv6-by-default.sh 10-listen-on-ipv6-by-default.sh: info: Getting the checksum of /etc/nginx/conf.d/default.conf 10-listen-on-ipv6-by-default.sh: info: Enabled listen on IPv6 in /etc/nginx/conf.d/default.conf /docker-entrypoint.sh: Sourcing /docker-entrypoint.d/15-local-resolvers.envsh /docker-entrypoint.sh: Launching /docker-entrypoint.d/20-envsubst-on-templates.sh /docker-entrypoint.sh: Launching /docker-entrypoint.d/30-tune-worker-processes.sh /docker-entrypoint.sh: Configuration complete; ready for start up 2025/06/19 03:55:18 [notice] 1#1: using the "epoll" event method 2025/06/19 03:55:18 [notice] 1#1: nginx/1.27.5 2025/06/19 03:55:18 [notice] 1#1: built by gcc 12.2.0 (Debian 12.2.0-14) 2025/06/19 03:55:18 [notice] 1#1: OS: Linux 5.14.0-427.13.1.el9_4.x86_64 2025/06/19 03:55:18 [notice] 1#1: getrlimit(RLIMIT_NOFILE): 65536:65536 2025/06/19 03:55:18 [notice] 1#1: start worker processes 2025/06/19 03:55:18 [notice] 1#1: start worker process 29 2025/06/19 03:55:18 [notice] 1#1: start worker process 30 2025/06/19 03:55:18 [notice] 1#1: start worker process 31 2025/06/19 03:55:18 [notice] 1#1: start worker process 32
这里我们可以再开一个ssh会话来验证job-2的容器是否在持续运行中,状态未up说明没问题,该容器此刻是可以持续运行的。
[root@localhost softapp]# docker ps
那是因为这个nginx镜像文件中指定了,该容器在运行时,会执行一个nginx -g daemon off的命令,这个是nginx服务启动的命令,-g表示在前台运行并输出日志,daemon off表示关闭守护进程。
如要查看容器中具体干了些什么,比如他在运行时会执行什么命令。
可以使用docker命令,inspect选项,【容器名】 ,他的输出格式为josn格式,并且信息很多,我们可以利用Linux的一些知识,筛选出我们想要看的内容,grep -A 表示输出Cmd条件后10行,示例如下:
1
2
3
4
5
6
7
8
9
10
11
12
[root@localhost softapp]# docker inspect job-2 | grep -A 10 Cmd "Cmd" : [ "nginx" , "-g" , "daemon off;" ], "Image" : "docker.m.daocloud.io/nginx:latest" , "Volumes" : null, "WorkingDir" : "" , "Entrypoint" : [ "/docker-entrypoint.sh" ],
但是这样我们会遇到另外一个问题,虽然我们知道只要容器只要挂着一个进程不停,容器就会一直持续运行,但是nginx镜像他是直接占用了宿主机的一个ssh前台进程,如果我们Ctrl+c停止掉,容器也会停止掉。
可以使用docker命令,run选项,-d选项将容器置与后台持续运行:
1
2
3
4
5
[root@localhost softapp]# docker run -d --name job-3 docker.m.daocloud.io/nginx:latest c0e8f1e16d3119f29be09cfe5d83b8429ea08f32f6918f02d7e309b433d3c91a [root@localhost softapp]# docker ps CONTAINER ID IMAGE COMMAND CREATED STATUS PORTS NAMES c0e8f1e16d31 docker.m.daocloud.io/nginx:latest "/docker-entrypoint.…" 22 seconds ago Up 21 seconds 80/tcp job-3
尝试进入容器 进入正在运行的容器内部,我们可以使用exec选项和 -it选项进入到容器内部,可查看容器内部是个什么样子,与我们正常的操作系统有什么不同,以及他是如何运行服务的,例如:
1
2
3
[root@localhost softapp]# docker exec -it job-3 /bin/bash root@c0e8f1e16d31:/#
命令解析:
docker:二进制命令。
exec:在正在运行的容器中运行命令。
-it:以交互方式建立容器伪终端。
job-3:容器名或容器ID。
/bin/bash:容器中执行打开bash命令
进入容器后我们可以发现常用的ll,top,ps -ef等等命令都不存在,那是因为最后我们介绍过,容器他是轻量化的一个服务打包,他不是最全的,他只包含了满足服务运行最基本的文件操作系统,以支撑例如nginx的运行条件。
1
2
3
4
5
6
7
8
9
10
11
12
13
14
15
16
17
18
19
20
21
22
23
24
25
26
27
28
29
30
31
32
33
34
35
36
37
38
39
root@c0e8f1e16d31:/# ll bash: ll: command not found root@c0e8f1e16d31:/# top bash: top: command not found root@c0e8f1e16d31:/# ip bash: ip: command not found root@c0e8f1e16d31:/# ifconfig bash: ifconfig: command not found root@c0e8f1e16d31:/# ls bin boot dev docker-entrypoint.d docker-entrypoint.sh etc home lib lib64 media mnt opt proc root run sbin srv sys tmp usr var root@c0e8f1e16d31:/# cd /usr/share/nginx/html root@c0e8f1e16d31:/usr/share/nginx/html# ls 50x.html index.html root@c0e8f1e16d31:/usr/share/nginx/html# curl 127.0.0.1 80 <!DOCTYPE html> <html> <head > <title>Welcome to nginx!</title> <style> html { color-scheme: light dark; } body { width: 35em; margin: 0 auto; font-family: Tahoma, Verdana, Arial, sans-serif; } </style> </head> <body> <h1>Welcome to nginx!</h1> <p>If you see this page, the nginx web server is successfully installed and working. Further configuration is required.</p> <p>For online documentation and support please refer to <a href="http://nginx.org/" >nginx.org</a>.<br/> Commercial support is available at <a href="http://nginx.com/" >nginx.com</a>.</p> <p><em>Thank you for using nginx.</em></p> </body> </html> ^C root@c0e8f1e16d31:/usr/share/nginx/html# exit
镜像的使用 镜像概述 镜像是一个用于创建容器的只读模板,镜像中包含着很多额外的参数定于,比如:我们基于centos文件系统构建一个服务这里把他称之为基础层,在这个centos文件系统上我们要再加上我们的服务,例如nginx、tomcat等等,以及他们所需的依赖,每次修改或新增都会增加一个镜像层,从而构建出我们期望的业务镜像。
同时镜像可以有公共镜像仓库或DockerFile自定义获得镜像。并将镜像推送到自己本地仓库或自己私有的镜像仓库进行存储,一遍以后重复构建更新、部署使用。
公共镜像仓库 Docker Hub是全球最大的公共镜像仓库,许多开源厂商都会将各自的官方开源镜像上传到Hub上供人拉取,这个服务是允许公众连接、创建、拉取、上传镜像使用,虽然便利但注意这是公共开源的仓库,不建议使用云端镜像仓库存放私有镜像,避免被别人拉取泄露。
Docker Hub官网地址: https://docker.czc.cloudns.biz/
私有镜像仓库 私有镜像仓库的用于与公共镜像仓库类似,唯一的区别就是该仓库是你独自搭建在你内网中的镜像仓库,除了你自己和你授权的人外,无人能访问该镜像仓库,以及无法从你的镜像仓库中拉取任何镜像,具体操作后续介绍。
常用的私有仓库服务工具 :Docker Hub、Harbor
查看本地镜像 不管是从公共镜像还是本地镜像拉取下来的镜像都存放在我们宿主机的本地镜像库中,只有拉取到本地镜像库后,才可以从本地镜像库中使用镜像去创建容器,查看我们现在以及拉取存在的镜像有哪些可以通过images进行查看。
格式 :docker images [镜像名]
不带镜像名则所有进项全部展示,当镜像过多时,我们可以加上镜像名去搜索我们想要看到的镜像,便于查找。
1
2
3
4
5
6
7
8
9
10
11
12
[root@localhost softapp]# docker images REPOSITORY TAG IMAGE ID CREATED SIZE job-02 latest a38262e3f7e4 23 minutes ago 4.28MB job-01 latest af8d6c46c922 30 minutes ago 4.28MB nginx 1.2 e76f04ecad6a 7 hours ago 192MB nginx v1 a5ca0b814874 4 days ago 192MB docker.m.daocloud.io/nginx latest 1e5f3c5b981a 2 months ago 192MB nginx latest 1e5f3c5b981a 2 months ago 192MB docker.m.daocloud.io/library/busybox latest 6d3e4188a38a 9 months ago 4.28MB [root@localhost softapp]# docker images nginx:v1 REPOSITORY TAG IMAGE ID CREATED SIZE nginx v1 a5ca0b814874 5 days ago 192MB
构建镜像的方式 docker commit
在使用容器镜像中,容器本身发生了修改,您想将当前状态下的容器制作为一个镜像,则可以使用commit(提交)选项将当前容器的状态保存到本地镜像仓库,以便后续的快速部署搭建。
DockerFile (推荐)
从零开始搭建你的镜像服务,在创建镜像前需要将该镜像的所有配置、依赖、基础镜像等自行编写进脚本中,生成的镜像可直接用于业务部署,但是对技术要求有难度,这个后续单独讨论。
commit镜像构建 结合上述运行容器和进入容器的方式,运行并修改一个容器内容,然后利用commit打包当前状态下的容器为一个新的镜像,示例如下:
1 2 3 4 5 6 7 8 9 10 11 12 13 14 15 16 17 18 19 20 21 22 23 24 25 [root@localhost ~]# docker run -d --name job-01 nginx:latest fca794f38cf76b39a92348d1d81bf3d98deb564b365d8cfb540e810a1e4e298b [root@localhost ~]# docker exec -it job-01 /bin/bash root@fca794f38cf7:/# echo 这是一个版本为1.2的nginx容器 >/usr/share/nginx/html/index.html root@fca794f38cf7:/usr/share/nginx/html# 键入【Ctrl+D】 exit [root@localhost ~]# docker commit job-01 nginx:1.2 sha256:e76f04ecad6a841c2f2023fb11f0bd873d6a06c411ea488d661e7e2557cb2952 [root@localhost ~]# docker images nginx:1.2 REPOSITORY TAG IMAGE ID CREATED SIZE nginx 1.2 e76f04ecad6a 55 seconds ago 192MB [root@localhost ~]# docker run -d --name job-02 nginx:1.2 3c1b5719206b5def9adde8a3b0d76490208226ee41facab45082d6c37c195426 [root@localhost ~]# docker exec -it job-02 /bin/bash root@3c1b5719206b:/# curl 127.0.0.1:80 这是一个版本为1.2的nginx容器 root@3c1b5719206b:/#
DockerFile的使用 DockerFile是一个文本文件,包含了构建Docker镜像所有的指令。
使用DockerFile定制镜像 在一个空目录下,创建一个名为Dockerfile的文本文件,并添加一下内容:
1
2
FROM nginx RUN echo "这是一个本地构建的Nginx镜像" > /usr/share/nginx/html/index.html
FROM :定制的镜像都基于FROM的镜像来构建的,也就是基础镜像,后续的所有操作都是建立在这个基础镜像上去进行修改定制。
RUN :用于在基础镜像上执行的相应定制化执行shell命令,需要允许的命令可以有一下两种格式写法。
1 2 3 4 5 6 RUN <命令行> RUN ["二进制命令" ,"选项/参数" ,"选项/参数" ] 例如:每一个逗号分割代表一个单词,空格分割 RUN ["tail" ,"-n" ,"10" ,"test.txt" ]等效与 RUN tail -n 10 test.txt
注意:Dockerfile的指令每一行都会在这个镜像上新建一层,所以在书写Dockerfile指令时,避免书写过多没必要的指令,会造成镜像容量过大。
该命令只会创建三层:
1
2
3
FROM ubuntu RUN dnf install wget RUN wget -O redis.tar.gz "http://download.redis.io/releases/redis-5.0.3.tar.gz"
合理使用【\】换行,【&&】符号多个命令拼接,组成一条命令,这样可以避免重复RUN指令,该条命令则只会生成两层。
1
2
3
4
FROM ubuntu RUN dnf install wget \ && wget -O redis.tar.gz "http://download.redis.io/releases/redis-5.0.3.tar.gz" \ && tar -zxvf ./redis-5.0.3.tar.gz
开始构建镜像 在DockerFile文件目录下进行构建操作。
以下示例通过DockerFile构建一个名为nginx:v1(镜像名称:镜像标签/版本号)。
1
2
3
4
5
6
7
8
9
10
11
12
13
14
15
16
17
18
19
20
21
[root@localhost softapp]# docker build -t nginx:v1 . DEPRECATED: The legacy builder is deprecated and will be removed in a future release. Install the buildx component to build images with BuildKit: https://docs.docker.com/go/buildx/ Sending build context to Docker daemon 300.2MB Step 1/2 : FROM nginx ---> 1e5f3c5b981a Step 2/2 : RUN echo "这是一个本地构建的Nginx镜像" > /usr/share/nginx/html/index.html ---> Running in bbb2493f7b99 ---> Removed intermediate container bbb2493f7b99 ---> a5ca0b814874 Successfully built a5ca0b814874 Successfully tagged nginx:v1 [root@localhost softapp]# docker images REPOSITORY TAG IMAGE ID CREATED SIZE nginx v1 a5ca0b814874 31 seconds ago 192MB nginx latest 1e5f3c5b981a 2 months ago 192MB docker.m.daocloud.io/nginx latest 1e5f3c5b981a 2 months ago 192MB docker.m.daocloud.io/library/busybox latest 6d3e4188a38a 8 months ago 4.28MB
注意:文件名称一定要是Dockerfile,否则会出现我这样的报错,找不到Dockerfile文件。
解析:在构建镜像的时候,有时候会使用到本机的文件,比如我们需要将本地的文件复制到这个镜像里,docker build得知这个路径后,会将路径下的所有内容打包,由于docker的允许模式是C/S。C是我们本机,也称为宿主机,S是docker引擎,实际的构建过程是在docker引擎内完成的,这个时候是无法用到我们宿主机的文件,这就是为什么build得知路径后会将路径下的内容都打包到引擎中,命令中最后的点(.)就是指的这个上下文路径,所以路径中不要防无用的文件,避免构建过慢。
DockerFile常用指令集
Dockerfile指令
说明
FROM
指定基础镜像,用于后续的指令定制构建
MAINTAINER
指定Dockerfile的作者(已启用,推荐使用LABEL)
LABEL
添加镜像的元数据\描述,采用键值对的形式
RUN
在构建过程中,在镜像需要执行的命令
CMD
指定镜像创建容器运行时默认需要运行的命令(可覆盖基础镜像的CMD)
ENTRYPOINT
指定镜像创建容器运行时主要的命令。(不可被覆盖)
EXPOSE
声明容器运行时监听特定的网络端口,供宿主机及外部进行访问容器内的访问。
ENV
在容器中设置环境变量
ADD
将文件、目录或远程URL复制到镜像中,如果文件属于tar、gizp等压缩文件会自动为您解压。
COPY
将文件或目录复制到镜像中。
VOLUME
为容器创建与宿主机磁盘的挂载点,供在宿主机即可操作容器内的重要文件数据。
WORKDIR
指定后续镜像构建中的指令执行时的工作目录,如不存在则会自动创建(类似于Linux中的cd命令,不同的是目录不存在会自动创建)
USER
指定后续dockerfile指令使用的用户,以及容器运行时服务默认启动的用户,如没有配置默认是root(类似Linux中的su,切换用户)
ARG
定义构建镜像中的变量(他与ENV不同,ENV是容器中的环境变量,适用于容器中,ARG仅适用于dockerfile脚本文件中,类似ssh脚本中设置的变量)
ONBUILD
触发式执行,本身不会执行,触发条件当该镜像被作为基础镜像构建新镜像时触发相应指定的指令操作,RUN或LABEL指令。
STOPSIGNAL
当容器停止进程调用时,用于发送给容器的信号,例如在使用docker stop,Linux的信号可以参考RedHat章节了解。
HEALTHCHECK
容器服务的健康检查,容器可能处于启动,但是内部的服务不一定正常运行,需要使用该指令定期检查服务是否存活,如检测失败状态则会标记为unhealthy。
SHELL
用于修改默认shell环境,通常修改为/bin/bash或sh
LABEL指令的使用 为镜像设置一个元数据【标签】,目前常用为作者等一些个性化定制信息,不管是用于镜像的描述,还是镜像的特殊标识区分
格式 :LABEL :
1
2
3
FROM nginx:1.2 LABEL author:liweihu RUN echo "这是一个本地构建的Nginx镜像" > /usr/share/nginx/html/index.html
CMD指令的使用 为镜像设置一个容器启动时默认需要运行的命令,当该命令执行完成后,也就以为容器停止,如果该服务属于持续运行的业务,需要保证该命令能持续运行,例如nginx,后台启动一个nginx服务,该指令可以被docker run创建容器时被参数所覆盖,导致不执行。
格式 :CMD 或者 CMD [“可执行文件或命令”,”选项/参数”,……]
以下示例中的CMD是nginx官方镜像写的,他是作用是运行nginx并放在前台运行,已保证容器内始终都会有一个进程或终端在运行,从而达到可持久运行的容器,如果在docker run的使用其他的参数将他覆盖,则容器可能启动既停止。
1
2
3
4
FROM nginx:1.2 LABEL author:liweihu RUN echo "这是一个本地构建的Nginx镜像" > /usr/share/nginx/html/index.html CMD ["nginx" ,"-g" ,"daemon off;" ]
ENTRYPOINT指令的使用 与CMD同样,区别在于ENTRYPOINT不可被覆盖,他作为该镜像启动容器的主要命令。
格式 :ENTRYPOINT [“可执行文件或命令”,”选项/参数”,……]
1
2
3
4
5
FROM nginx:1.2 LABEL author:liweihu RUN echo "这是一个本地构建的Nginx镜像" > /usr/share/nginx/html/index.html CMD ["nginx" ,"-g" ,"daemon off;" ] ENTRYPOINT ["/docker-entrypoint.sh" ]
重要:当dockerfile中只有CMD时,CMD则是作为启动容器服务的语句使用,同时CMD可被docker run覆盖。
当dockerfile同时存在CMD和ENTRYPOINT时,CMD则不再是启动容器的指令,而是作为参数,传递给ENTRYPOINT去启动容器服务,以下示例来简短验证。
1 2 3 4 5 6 7 8 9 10 11 12 13 14 15 16 17 18 19 20 21 22 [root@localhost softapp]# cat Dockerfile FROM docker.m.daocloud.io/library/busybox:latest CMD echo "这是cmd运行的指令" [root@localhost softapp]# docker build -t job-01:latest . DEPRECATED: The legacy builder is deprecated and will be removed in a future release. Install the buildx component to build images with BuildKit: https://docs.docker.com/go/buildx/ Sending build context to Docker daemon 300.2MB Step 1/2 : FROM docker.m.daocloud.io/library/busybox:latest ---> 6d3e4188a38a Step 2/2 : CMD echo "这是cmd运行的指令" ---> Running in 6a5441c4a26b ---> Removed intermediate container 6a5441c4a26b ---> af8d6c46c922 Successfully built af8d6c46c922 Successfully tagged job-01:latest [root@localhost softapp]# docker run job-01:latest 这是cmd运行的指令
当cmd和ENTRYPOINT同时存在时,他们的shell语法得都用json格式,否则无效。
1 2 3 4 5 6 7 8 9 10 11 12 13 14 15 16 17 18 19 20 21 22 23 24 25 26 27 28 29 [root@localhost softapp]# cat Dockerfile FROM docker.m.daocloud.io/library/busybox:latest CMD ["这是cmd运行的指令" ] ENTRYPOINT ["echo" ] [root@localhost softapp]# docker build -t job-02 . DEPRECATED: The legacy builder is deprecated and will be removed in a future release. Install the buildx component to build images with BuildKit: https://docs.docker.com/go/buildx/ Sending build context to Docker daemon 300.2MB Step 1/3 : FROM docker.m.daocloud.io/library/busybox:latest ---> 6d3e4188a38a Step 2/3 : CMD ["这是cmd运行的指令" ] ---> Running in 7aae458a0d54 ---> Removed intermediate container 7aae458a0d54 ---> 048f8b333e50 Step 3/3 : ENTRYPOINT ["echo" ] ---> Running in dbc0f5115ef6 ---> Removed intermediate container dbc0f5115ef6 ---> a38262e3f7e4 Successfully built a38262e3f7e4 Successfully tagged job-02:latest [root@localhost softapp]# docker run job-02:latest 这是cmd运行的指令 [root@localhost softapp]#
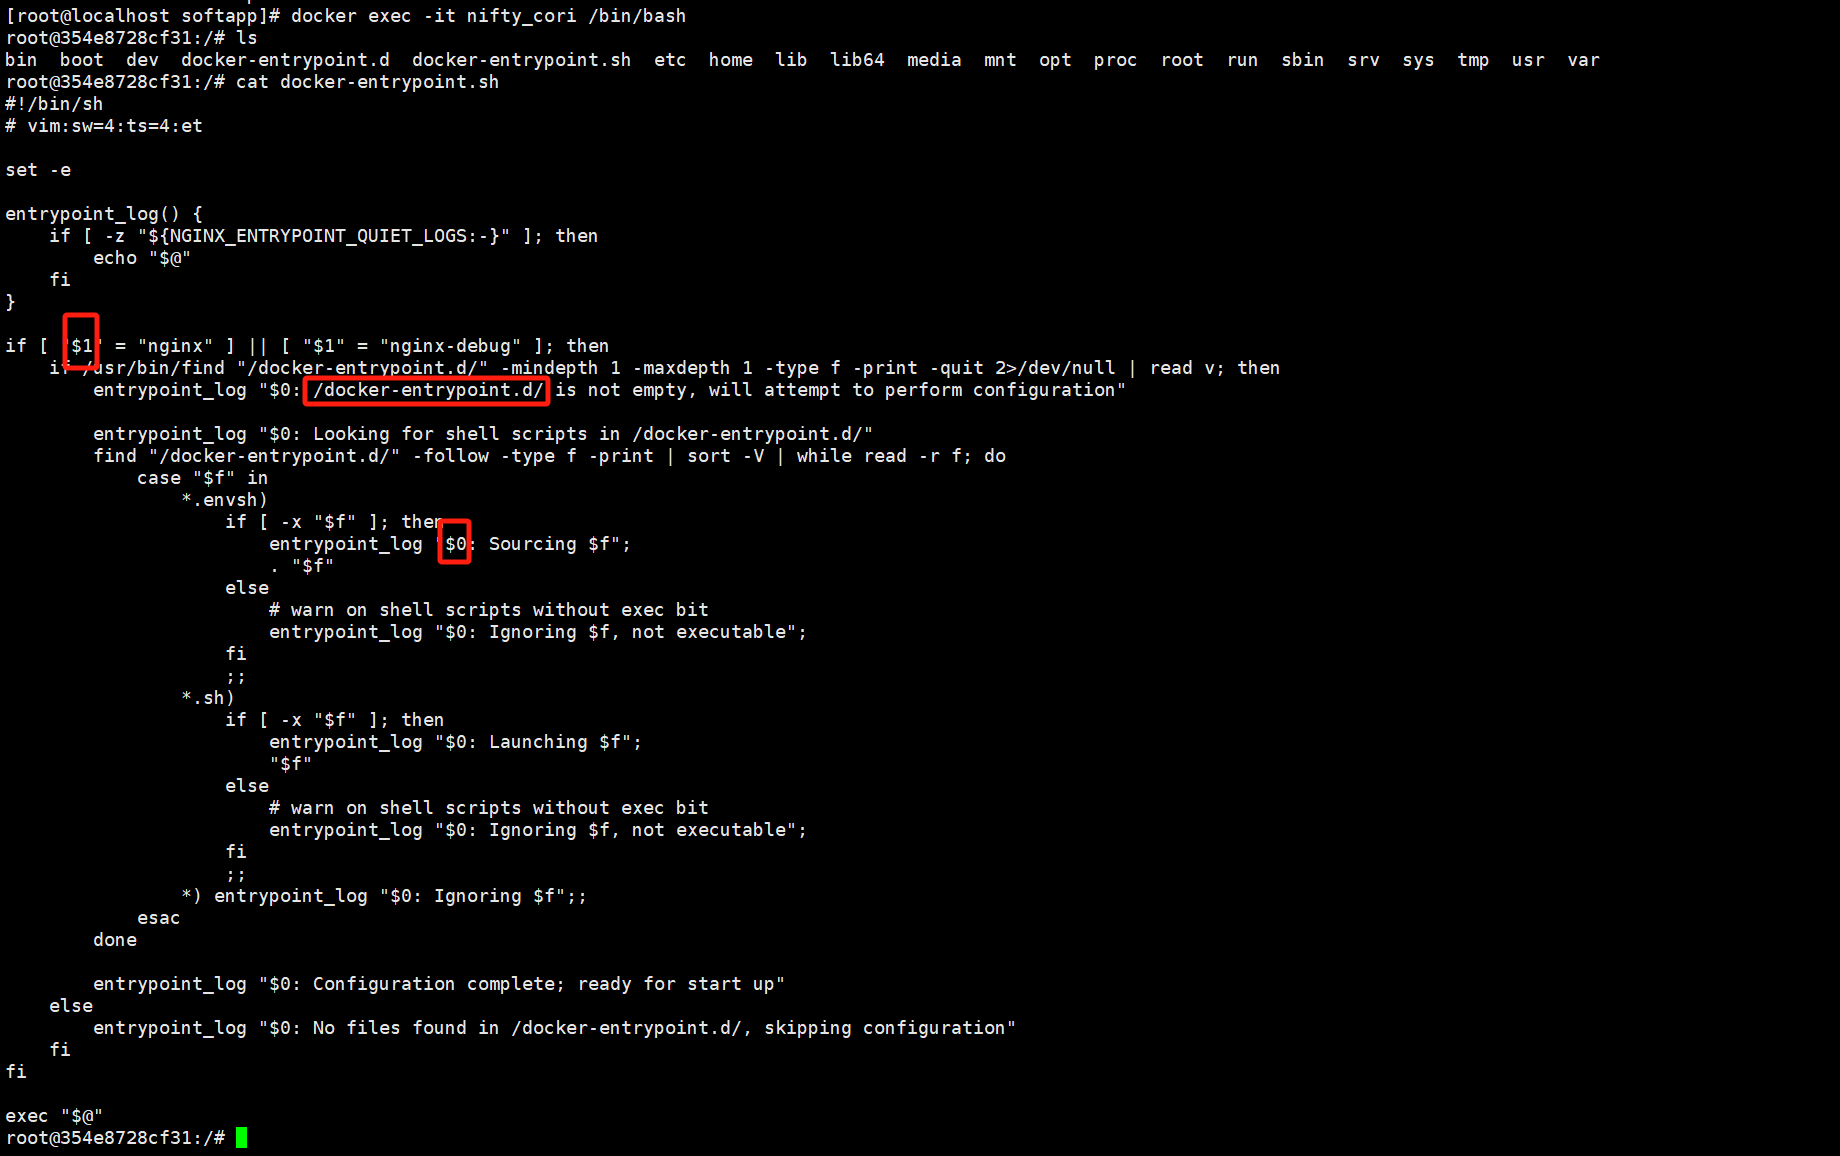
所以细心的会发现nginx官方镜像中实际运行nginx容器服务的是ENTRYPOINT,有过Linux基础的应该清楚,$0表示脚本文件名,$1、2……N表示传递过来的参数,所以他通过内置的shell脚本加上cmd的参数载入,以及
/docker-entrypoint.d下的一系列配置脚本,完成了镜像的整个初始化工作有兴趣的可以自行去研究,精力有限这里就不在过多讨论。
dockerfile指令很多,感兴趣的可以自行挨个操作实验,本文主要是为了讲解如何用k8s管理好docker等容器服务,docker实际的操作我们会用的非常少,过于复杂的东西了解即可。
删除容器和本地镜像 上诉我们做了很多实验创建了很多容器和镜像,虽然每个镜像都非常小,但是作为管理员过多的镜像对我们运维过程中会造成很多困扰,所以作为管理员还是要定期维护一下我们过期无用的容器和镜像。
删除容器格式 : docker rm 容器ID/容器名
注意:当要删除的容器处于运行状态时是不能删除的,需先将其docker stop进行停止,或者在结尾加上–force选项,强制删除,但不建议这样做,容易导致容器服务数据异常,尤其容器是数据库服务。
1
2
3
4
5
6
7
8
9
10
11
12
[root@localhost softapp]# docker ps CONTAINER ID IMAGE COMMAND CREATED STATUS PORTS NAMES 354e8728cf31 nginx:1.2 "/docker-entrypoint.…" 26 minutes ago Up 26 minutes 80/tcp nifty_cori [root@localhost softapp]# docker rm 354e8728cf31 Error response from daemon: cannot remove container "354e8728cf31" : container is running: stop the container before removing or force remove [root@localhost softapp]# docker stop nifty_cori nifty_cori [root@localhost softapp]# docker rm nifty_cori nifty_cori
删除镜像格式 : docker rmi 镜像ID/镜像名:版本号
注意:如果该镜像正在被一个容器所使用,即使容器是停止的也是无法删除的,需要先将容器停止删除后方可删除镜像。
1
2
3
4
5
6
7
8
9
10
11
12
13
14
15
16
17
18
19
20
21
22
23
24
25
[root@localhost softapp]# docker images REPOSITORY TAG IMAGE ID CREATED SIZE job-02 latest a38262e3f7e4 35 minutes ago 4.28MB job-01 latest af8d6c46c922 42 minutes ago 4.28MB nginx 1.2 e76f04ecad6a 8 hours ago 192MB nginx v1 a5ca0b814874 5 days ago 192MB nginx latest 1e5f3c5b981a 2 months ago 192MB docker.m.daocloud.io/nginx latest 1e5f3c5b981a 2 months ago 192MB docker.m.daocloud.io/library/busybox latest 6d3e4188a38a 9 months ago 4.28MB [root@localhost softapp]# docker rmi job-01:latest job-02:latest Error response from daemon: conflict: unable to remove repository reference "job-01:latest" (must force) - container 546d94800abd is using its referenced image af8d6c46c922 Error response from daemon: conflict: unable to remove repository reference "job-02:latest" (must force) - container d159e8586dd3 is using its referenced image a38262e3f7e4 [root@localhost softapp]# docker rm 546d94800abd d159e8586dd3 546d94800abd d159e8586dd3 [root@localhost softapp]# docker rmi job-01:latest job-02:latest Untagged: job-01:latest Deleted: sha256:af8d6c46c922db8c8102aab14568a6a4f1d0982871aae32bab41d564654a20c2 Untagged: job-02:latest Deleted: sha256:a38262e3f7e42c9c344ad005f8034cffbfcd48dd8b67ee94cd55878032c82b5b Deleted: sha256:048f8b333e508e2005b52f417f6abdda0df351fcb81b52034774cdecfb5635bd
构建Harbor私有镜像仓库 什么是Harbor?Harbor是一个开源注册中心,它通过策略和基于角色的访问控制来保护工件,确保图像经过扫描且不存在漏洞,并将图像标记为可信。Harbor是CNCF的毕业项目,它提供合规性,性能及互操作性,帮助您在 Kubernetes和 Docker等云原生计算平台上,以一致且安全的方式管理工件(镜像),所以本章节咱们采用它来作为我们的私有镜像仓库。
确保您的目标主机满足Harbor安装前提条件 资源需求
资源
最低要求
推荐
CPU
2
4
内存
4GB
8GB
磁盘
40GB
160GB
服务器软件要求
软件
版本
描述
Docker引擎
版本 > 20.10
Docker引擎安装
Docker Compose
Docker compose > 2.3
Docker compose是Docker引擎的一部分
OpenSSL
最新(可选)
用于生成Harbor的证书和密钥
网络端口
端口
协议
描述
443
HTTPS
Harbor门户和核心API在此端口接受HTTPS请求。您可以在配置文件中更改此端口。
80
HTTP
Harbor门户和核心API在此端口接受HTTP请求。您可以在配置文件中更改此端口。
环境配置
将宿主机的主机名及Hosts文件修改为您的镜像仓库地址
1 2 3 4 5 6 7 8 9 10 11 12 13 14 15 16 [root@localhost harbor]# hostnamectl hostname reg.liweihu.cn [root@localhost harbor]# hostname liweihu.com [root@localhost harbor]# bash [root@localhost harbor]# echo "192.168.8.135 reg.liweihu.cn" >> /etc/hosts [root@localhost harbor]# systemctl disable firewalld && systemctl stop firewalld [root@localhost harbor]# sudo sed -i 's/^SELINUX=enforcing$/SELINUX=permissive/' /etc/selinux/config [root@localhost harbor]# setenforce 0 [root@localhost harbor]# iptables -F && iptables -X && iptables -Z [root@localhost harbor]# iptables -P FORWARD ACCEPT
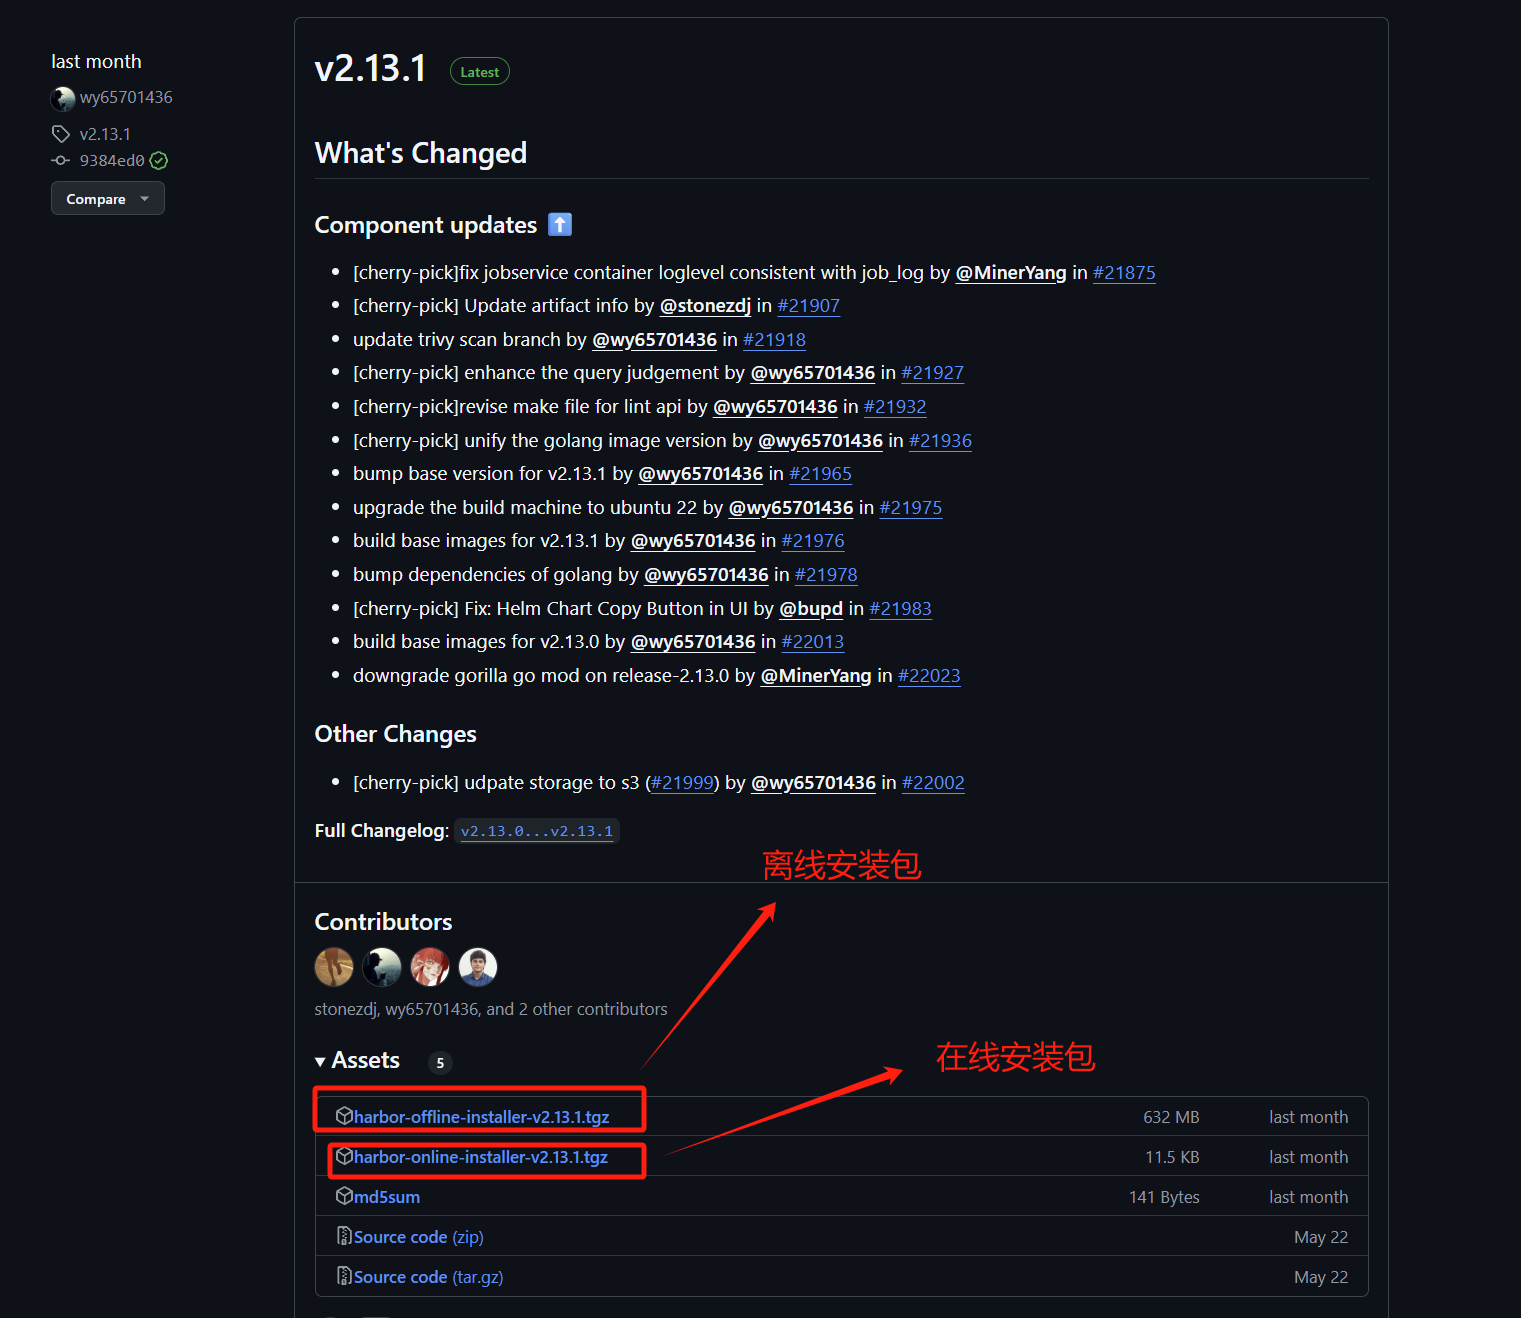
下载Harbor安装程序 离线安装包下载地址 :https://github.com/goharbor/harbor/releases
离线安装包较大,在线的较小,由于考虑到生产中我们是很少出现服务器能连通互联网的情况,所以我们尽量都用离线的方式来部署。
配置访问Harbor的HTTPS 生成根CA密钥、证书
1
2
3
4
5
6
[root@reg /]# mkdir ~/ca && cd ~/ [root@localhost harbor]# openssl genrsa -out ca.key 4096 [root@localhost harbor]# openssl req -x509 -new -nodes -sha512 -days 3650 \ -subj "/C=CN/ST=Beijing/L=Beijing/O=example/OU=Personal/CN=Root" \ -key ca.key \ -out ca.crt
生成服务器CA密钥、证书
1
2
3
4
5
[root@localhost harbor]# openssl genrsa -out reg.liweihu.cn.key 4096 [root@localhost harbor]# openssl req -sha512 -new \ -subj "/C=CN/ST=Beijing/L=Beijing/O=example/OU=Personal/CN=reg.liweihu.cn" \ -key reg.liweihu.cn.key \ -out reg.liweihu.cn.csr
生成一个X509 V3扩展文件
无论您是使用FQDN还是IP地址来连接您的Harbor主机,都必须创建此文件,以便能够为您的Harbor主机生成符合主题替代名SAN)和x509v3扩展要求的证书。请替换DNS条目以反映您的域名。
1
2
3
4
5
6
7
8
9
10
[root@liweihu softapp]# cat > v3.ext <<-EOF authorityKeyIdentifier=keyid,issuer basicConstraints=CA:FALSE keyUsage = digitalSignature, nonRepudiation, keyEncipherment, dataEncipherment extendedKeyUsage = serverAuth subjectAltName = @alt_names [alt_names] DNS.1=reg.liweihu.cn EOF
使用V3.ext文件为您的Harbor主机生成证书
将CSR和CRT文件名中的liweihu.com替换为Harbor主机名。
1
2
3
4
5
[root@liweihu softapp]# openssl x509 -req -sha512 -days 3650 \ -extfile v3.ext \ -CA ca.crt -CAkey ca.key -CAcreateserial \ -in reg.liweihu.cn.csr \ -out reg.liweihu.cn.crt
将证书提供给Harbor和Docker 在生成ca.crt、liweihu.com.crt 和liweihu.com.key文件后,您必须将它们提供给Harbor和Docker,并重新配置Harbor以使用这些文件。
1.将服务器证书和密钥复制到Harbor主机上的证书文件夹中。
1
2
[root@localhost softapp]# mkdir -p /data/cert [root@localhost softapp]# cp reg.liweihu.cn.crt reg.liweihu.cn.key /data/cert/
2、将liweihu.com.crt转换为liweihu.com.cert,以便Docker使用。
1 [root@localhost softapp]# openssl x509 -inform PEM -in reg.liweihu.cn.crt -out reg.liweihu.cn.cert
3、将服务器证书、私钥和 CA 文件复制到Harbor主机的Docker证书文件夹中。首先必须创建相应的文件夹。
1
2
[root@localhost softapp]# mkdir -p /etc/docker/certs.d/reg.liweihu.cn/ [root@localhost softapp]# cp reg.liweihu.cn.cert reg.liweihu.cn.key ca.crt /etc/docker/certs.d/reg.liweihu.cn/
注意:如果你将默认的nginx的HTTPS端口443映射到不同的端口,请将创建文件夹在按照如下格式进行创建:/etc/docker/certs.d/yourdomain.com:port,或/etc/docker/certs.d/你的域名_IP:端口。
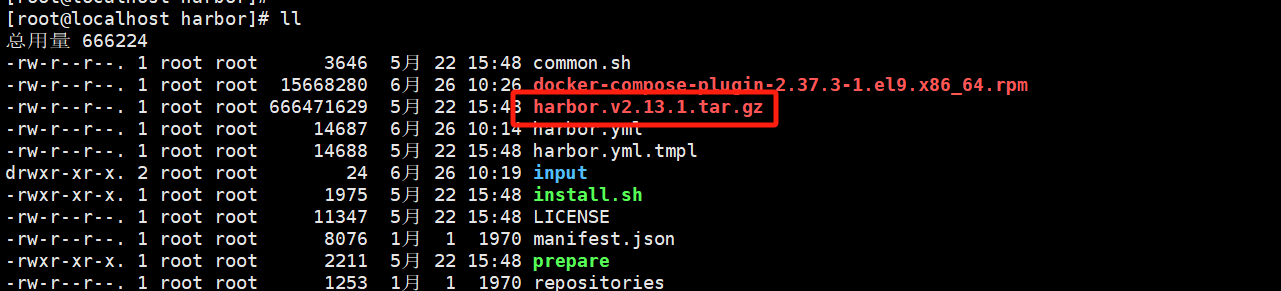
配置HarborYML文件 1 2 3 4 5 6 7 8 9 10 11 12 13 14 15 16 17 [root@localhost softapp]# tar -zxvf /opt/softapp/harbor-offline-installer-v2.13.1.tgz -C /opt/softapp/ && cd /opt/softapp/harbor harbor/harbor.v2.13.1.tar.gz harbor/prepare harbor/LICENSE harbor/install.sh harbor/common.sh harbor/harbor.yml.tmpl [root@localhost harbor]# cp /opt/softapp/harbor/harbor.yml.tmpl harbor.yml [root@localhost harbor]# vim harbor.yml
部署Docker-compose 下载地址:https://download.docker.com/linux/rhel/9/x86_64/stable/Packages/
rpm安装Docker-compose
1 2 3 4 5 6 [root@localhost harbor]# rpm -ivh docker-compose-plugin-2.37.3-1.el9.x86_64.rpm 警告:docker-compose-plugin-2.37.3-1.el9.x86_64.rpm: 头V4 RSA/SHA512 Signature, 密钥 ID 621e9f35: NOKEY Verifying... 准备中... 正在升级/安装... 1:docker-compose-plugin-0:2.37.3-1.################################# [100%]
运行安装脚本 我们下载过来离线按照包解压后,解压包里还包含的一个解压包,名为:harbor.v2.13.1.tar.gz,这其实就是将原本需要在线下载的镜像一起打包下载到本地,通过本地进行导入。
1 2 3 4 5 6 7 8 9 10 11 12 13 14 15 16 17 18 19 20 21 22 23 24 25 26 27 28 29 30 31 32 33 34 [root@localhost harbor]# ./install.sh [Step 0]: checking if docker is installed ... Note: docker version: 28.2.2 [Step 1]: checking docker-compose is installed ... Note: Docker Compose version v2.37.3 [Step 2]: loading Harbor images ... ......忽略..... ✔ Container nginx Started 4.1s ✔ Container harbor-jobservice Started 3.8s ✔ ----Harbor has been installed and started successfully.---- [root@localhost harbor]# docker images REPOSITORY TAG IMAGE ID CREATED SIZE ...忽略... goharbor/harbor-exporter v2.13.1 8323e56fa034 4 weeks ago 127MB goharbor/redis-photon v2.13.1 27079bef6812 4 weeks ago 166MB goharbor/trivy-adapter-photon v2.13.1 9d2de710e1bc 4 weeks ago 387MB goharbor/harbor-registryctl v2.13.1 1ca7f7dffcb8 4 weeks ago 162MB goharbor/registry-photon v2.13.1 251eb949b8fc 4 weeks ago 85.9MB goharbor/nginx-photon v2.13.1 3a0ac2771512 4 weeks ago 151MB goharbor/harbor-log v2.13.1 49f7cdb104f3 4 weeks ago 164MB goharbor/harbor-jobservice v2.13.1 b964386ce624 4 weeks ago 174MB goharbor/harbor-core v2.13.1 701038c9f9cf 4 weeks ago 197MB goharbor/harbor-portal v2.13.1 254c145df624 4 weeks ago 159MB goharbor/harbor-db v2.13.1 8645cd204f13 4 weeks ago 273MB goharbor/prepare v2.13.1 eeb5b545352d 4 weeks ago 208MB ...忽略...
生成docker-compose启动项
1 2 3 4 5 6 7 8 9 10 11 12 13 14 15 16 17 18 19 20 21 22 23 24 25 26 27 28 29 30 31 32 33 34 35 36 37 38 39 40 41 42 43 44 45 46 47 48 49 [root@localhost harbor]# ./prepare prepare base dir is set to /opt/softapp/harbor Clearing the configuration file: /config/portal/nginx.conf Clearing the configuration file: /config/log/logrotate.conf Clearing the configuration file: /config/log/rsyslog_docker.conf Clearing the configuration file: /config/nginx/nginx.conf Clearing the configuration file: /config/core/env Clearing the configuration file: /config/core/app.conf Clearing the configuration file: /config/registry/passwd Clearing the configuration file: /config/registry/config.yml Clearing the configuration file: /config/registry/root.crt Clearing the configuration file: /config/registryctl/env Clearing the configuration file: /config/registryctl/config.yml Clearing the configuration file: /config/db/env Clearing the configuration file: /config/jobservice/env Clearing the configuration file: /config/jobservice/config.yml Generated configuration file: /config/portal/nginx.conf Generated configuration file: /config/log/logrotate.conf Generated configuration file: /config/log/rsyslog_docker.conf Generated configuration file: /config/nginx/nginx.conf Generated configuration file: /config/core/env Generated configuration file: /config/core/app.conf Generated configuration file: /config/registry/config.yml Generated configuration file: /config/registryctl/env Generated configuration file: /config/registryctl/config.yml Generated configuration file: /config/db/env Generated configuration file: /config/jobservice/env Generated configuration file: /config/jobservice/config.yml copy /data/secret/tls/harbor_internal_ca.crt to shared trust ca dir as name harbor_internal_ca.crt ... ca file /hostfs/data/secret/tls/harbor_internal_ca.crt is not exist copy to shared trust ca dir as name storage_ca_bundle.crt ... copy None to shared trust ca dir as name redis_tls_ca.crt ... loaded secret from file: /data/secret/keys/secretkey Generated configuration file: /compose_location/docker-compose.yml Clean up the input dir [root@localhost harbor]# docker ps CONTAINER ID IMAGE COMMAND CREATED STATUS PORTS NAMES 53d7bdcf6d38 goharbor/harbor-jobservice:v2.13.1 "/harbor/entrypoint.…" 16 minutes ago Up 16 minutes (healthy) harbor-jobservice 4c8477948f20 goharbor/nginx-photon:v2.13.1 "nginx -g 'daemon of…" 16 minutes ago Up 16 minutes (healthy) 0.0.0.0:80->8080/tcp, [::]:80->8080/tcp, 0.0.0.0:443->8443/tcp, [::]:443->8443/tcp nginx 230a18014ab1 goharbor/harbor-core:v2.13.1 "/harbor/entrypoint.…" 16 minutes ago Up 16 minutes (healthy) harbor-core 500542b8846a goharbor/harbor-registryctl:v2.13.1 "/home/harbor/start.…" 16 minutes ago Up 16 minutes (healthy) registryctl c981c91c8842 goharbor/registry-photon:v2.13.1 "/home/harbor/entryp…" 16 minutes ago Up 16 minutes (healthy) registry 24fac7ba05eb goharbor/redis-photon:v2.13.1 "redis-server /etc/r…" 16 minutes ago Up 16 minutes (healthy) redis 18ddfef136e2 goharbor/harbor-portal:v2.13.1 "nginx -g 'daemon of…" 16 minutes ago Up 16 minutes (healthy) harbor-portal 585daf92fd4c goharbor/harbor-db:v2.13.1 "/docker-entrypoint.…" 16 minutes ago Up 16 minutes (healthy) harbor-db 0291f8c0fff2 goharbor/harbor-log:v2.13.1 "/bin/sh -c /usr/loc…" 16 minutes ago Up 16 minutes (healthy) 127.0.0.1:1514->10514/tcp harbor-log
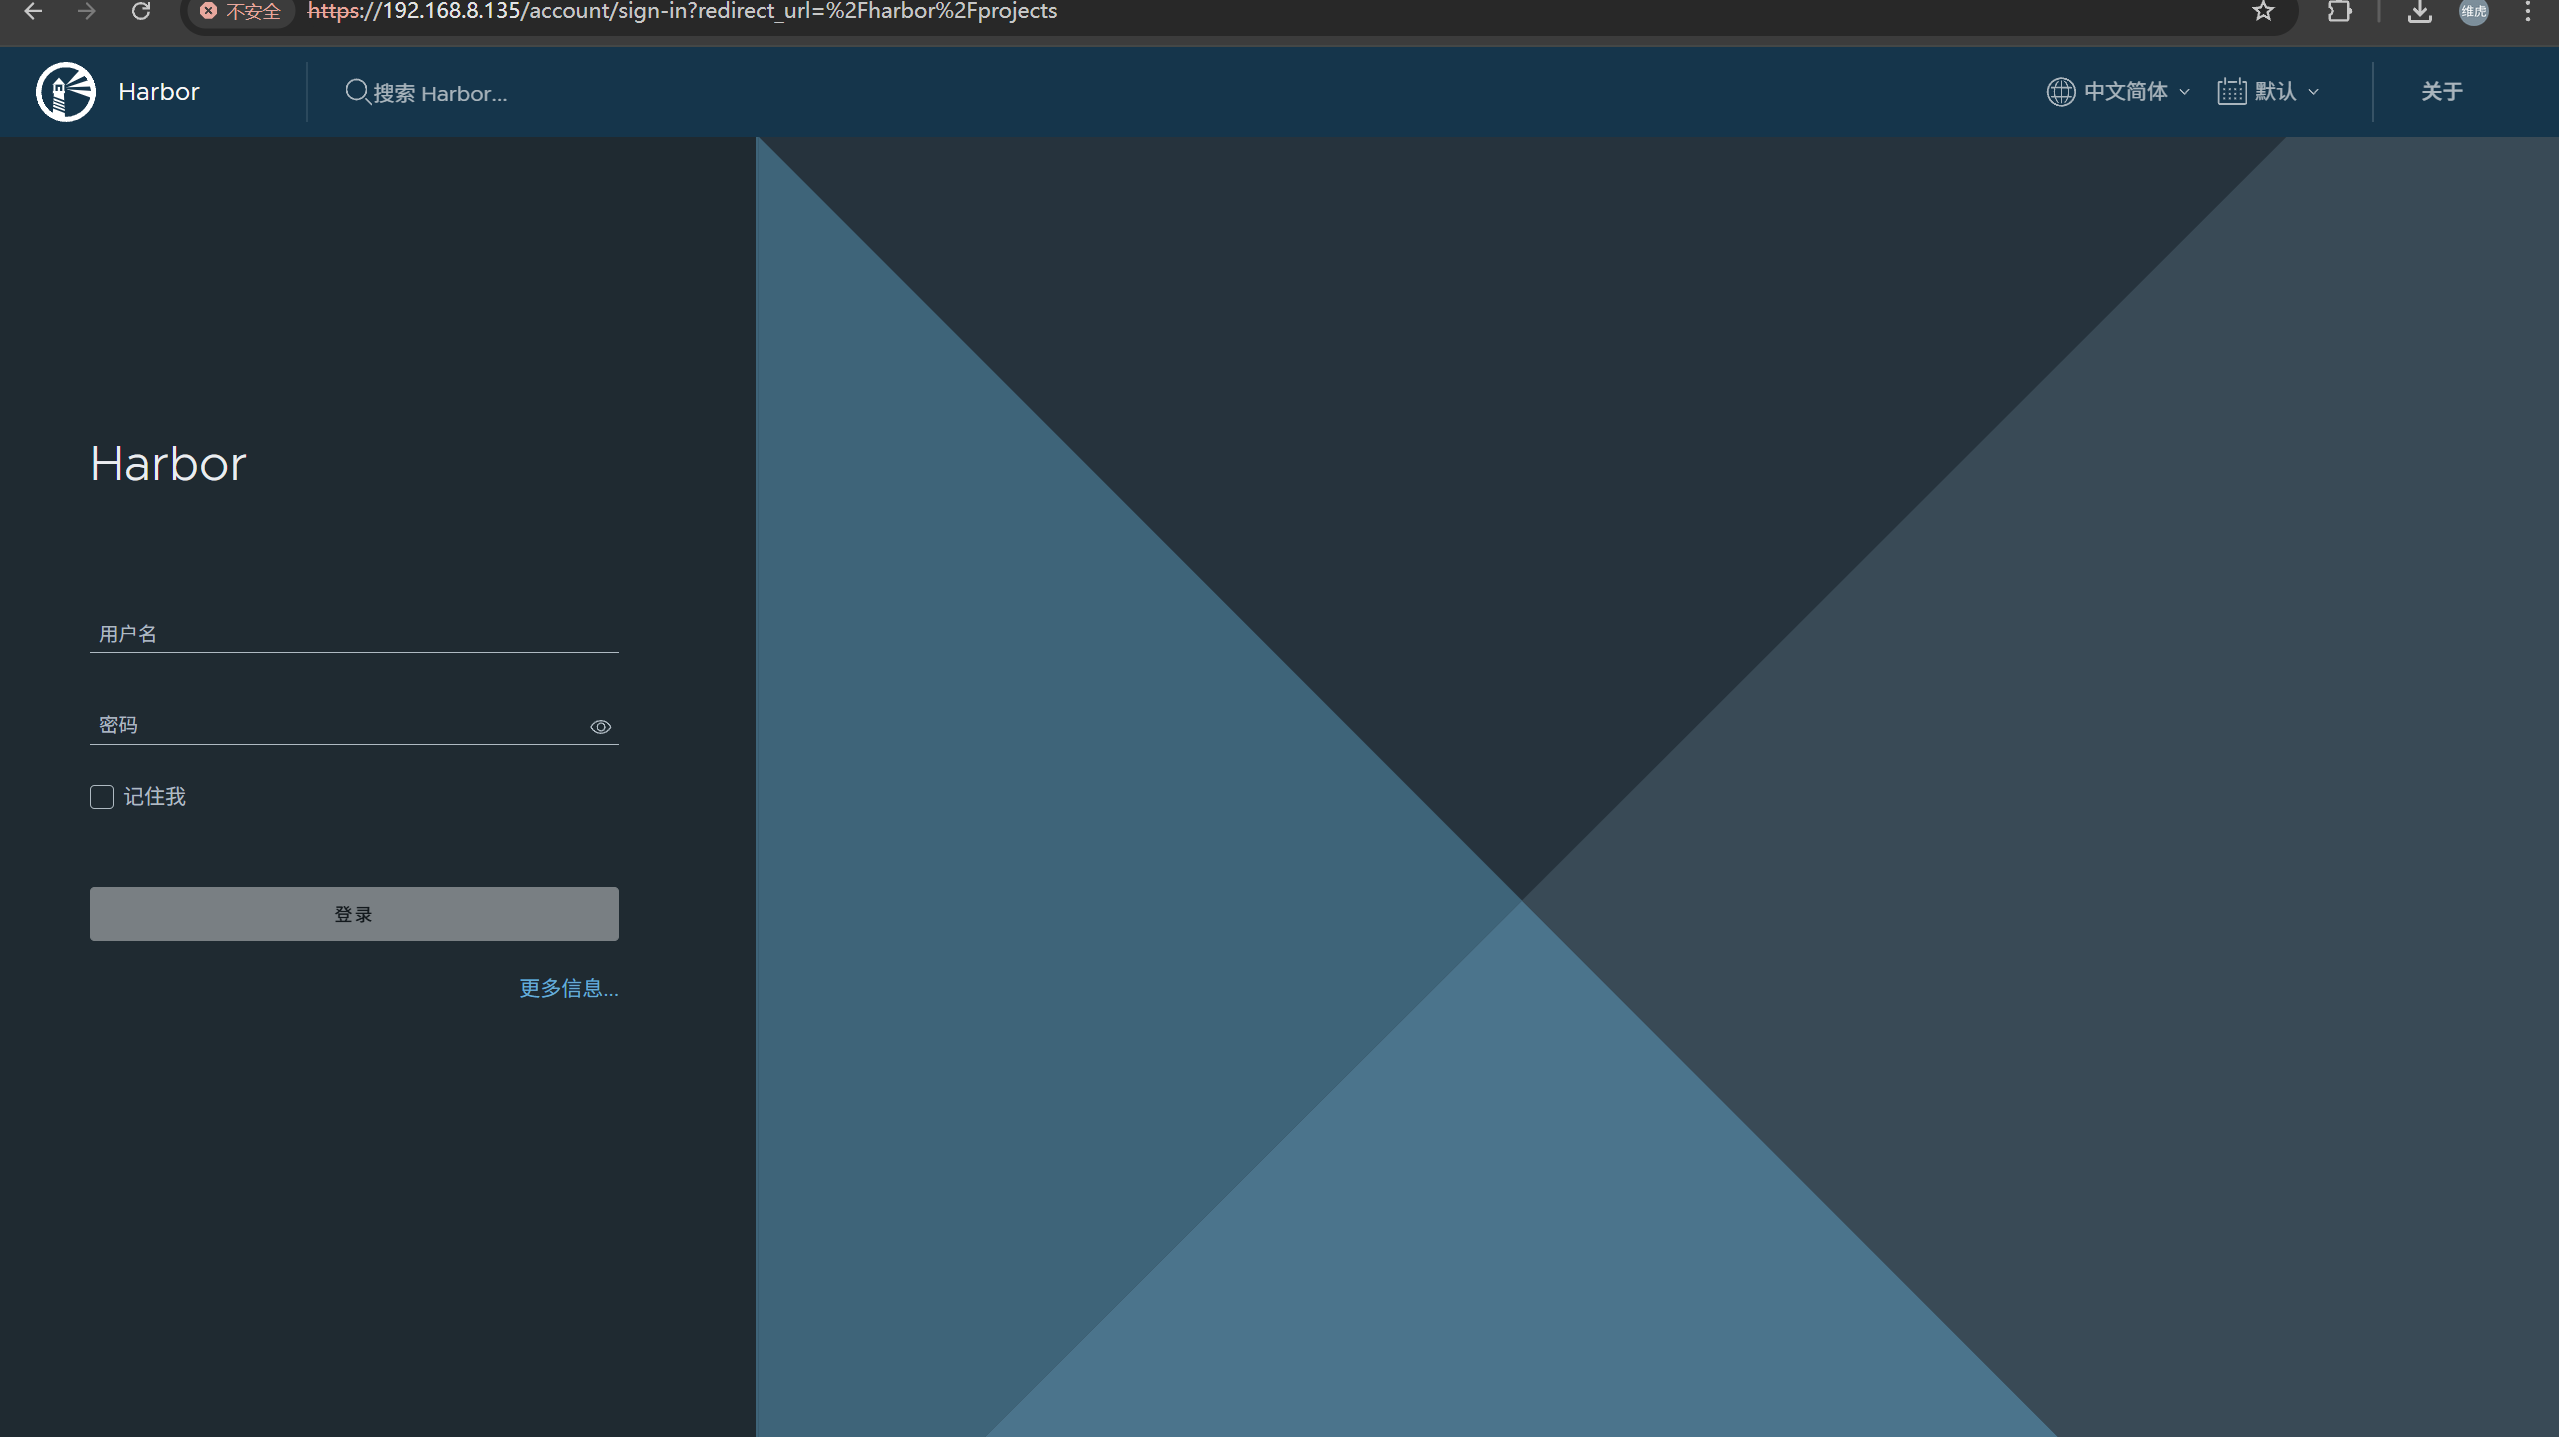
验证启动后就可以使用宿主机IP+端口验证一下浏览器是否可能正常Harbor:
默认的管理员账号为:admin,他的密码在harbor.yml配置文件中设置找到:
1 2 3 [root@localhost harbor]# grep harbor_admin_password harbor.yml harbor_admin_password: Harbor12345
将Harbor服务加入守护进程 1 2 3 4 5 6 7 8 9 10 11 12 13 14 15 16 17 [root@localhost harbor]# cat > /etc/systemd/system/harbor.service <<EOF [Unit] Description=Harbor After=docker.service systemd-networkd.service systemd-resolved.service Requires=docker.service Documentation=http://github.com/vmware/harbor [Service] Type=simple Restart=on-failure RestartSec=5 ExecStart=/usr/bin/docker compose -f /opt/softapp/harbor/docker-compose.yml up ExecStop=/usr/bin/docker compose -f /opt/softapp/harbor/docker-compose.yml down [Install] WantedBy=multi-user.target EOF [root@localhost harbor]# sudo systemctl daemon-reload [root@localhost harbor]# systemctl enable harbor --now
私有镜像的上传及拉取 由于我们采用的是HTTPS协议,之后我们每台docker宿主机需要从这个Harbor私有仓库拉取和上传镜像都需要将我们的服务器证书办法给他们,否则直接拉取会提示未经授权等错误信息。
配置docker加速文件
1 2 3 4 5 6 7 8 9 10 11 12 13 14 15 16 17 18 19 20 21 [root@liweihu docker]# cat > /etc/docker/daemon.json << EOF { "registry-mirrors": [ "https://docker.m.daocloud.io" ], "exec-opts":["native.cgroupdriver=systemd"], "insecure-registries": ["reg.liweihu.cn"] } EOF [root@liweihu docker]# pwd /etc/docker [root@liweihu docker]# tree /etc/docker/certs.d/ certs.d/ └── reg.liweihu.cn ├── ca.crt ├── reg.liweihu.cn.cert └── reg.liweihu.cn.key 1 directory, 3 files
尝试将本地镜像上传至私有仓库,验证服务是否正常
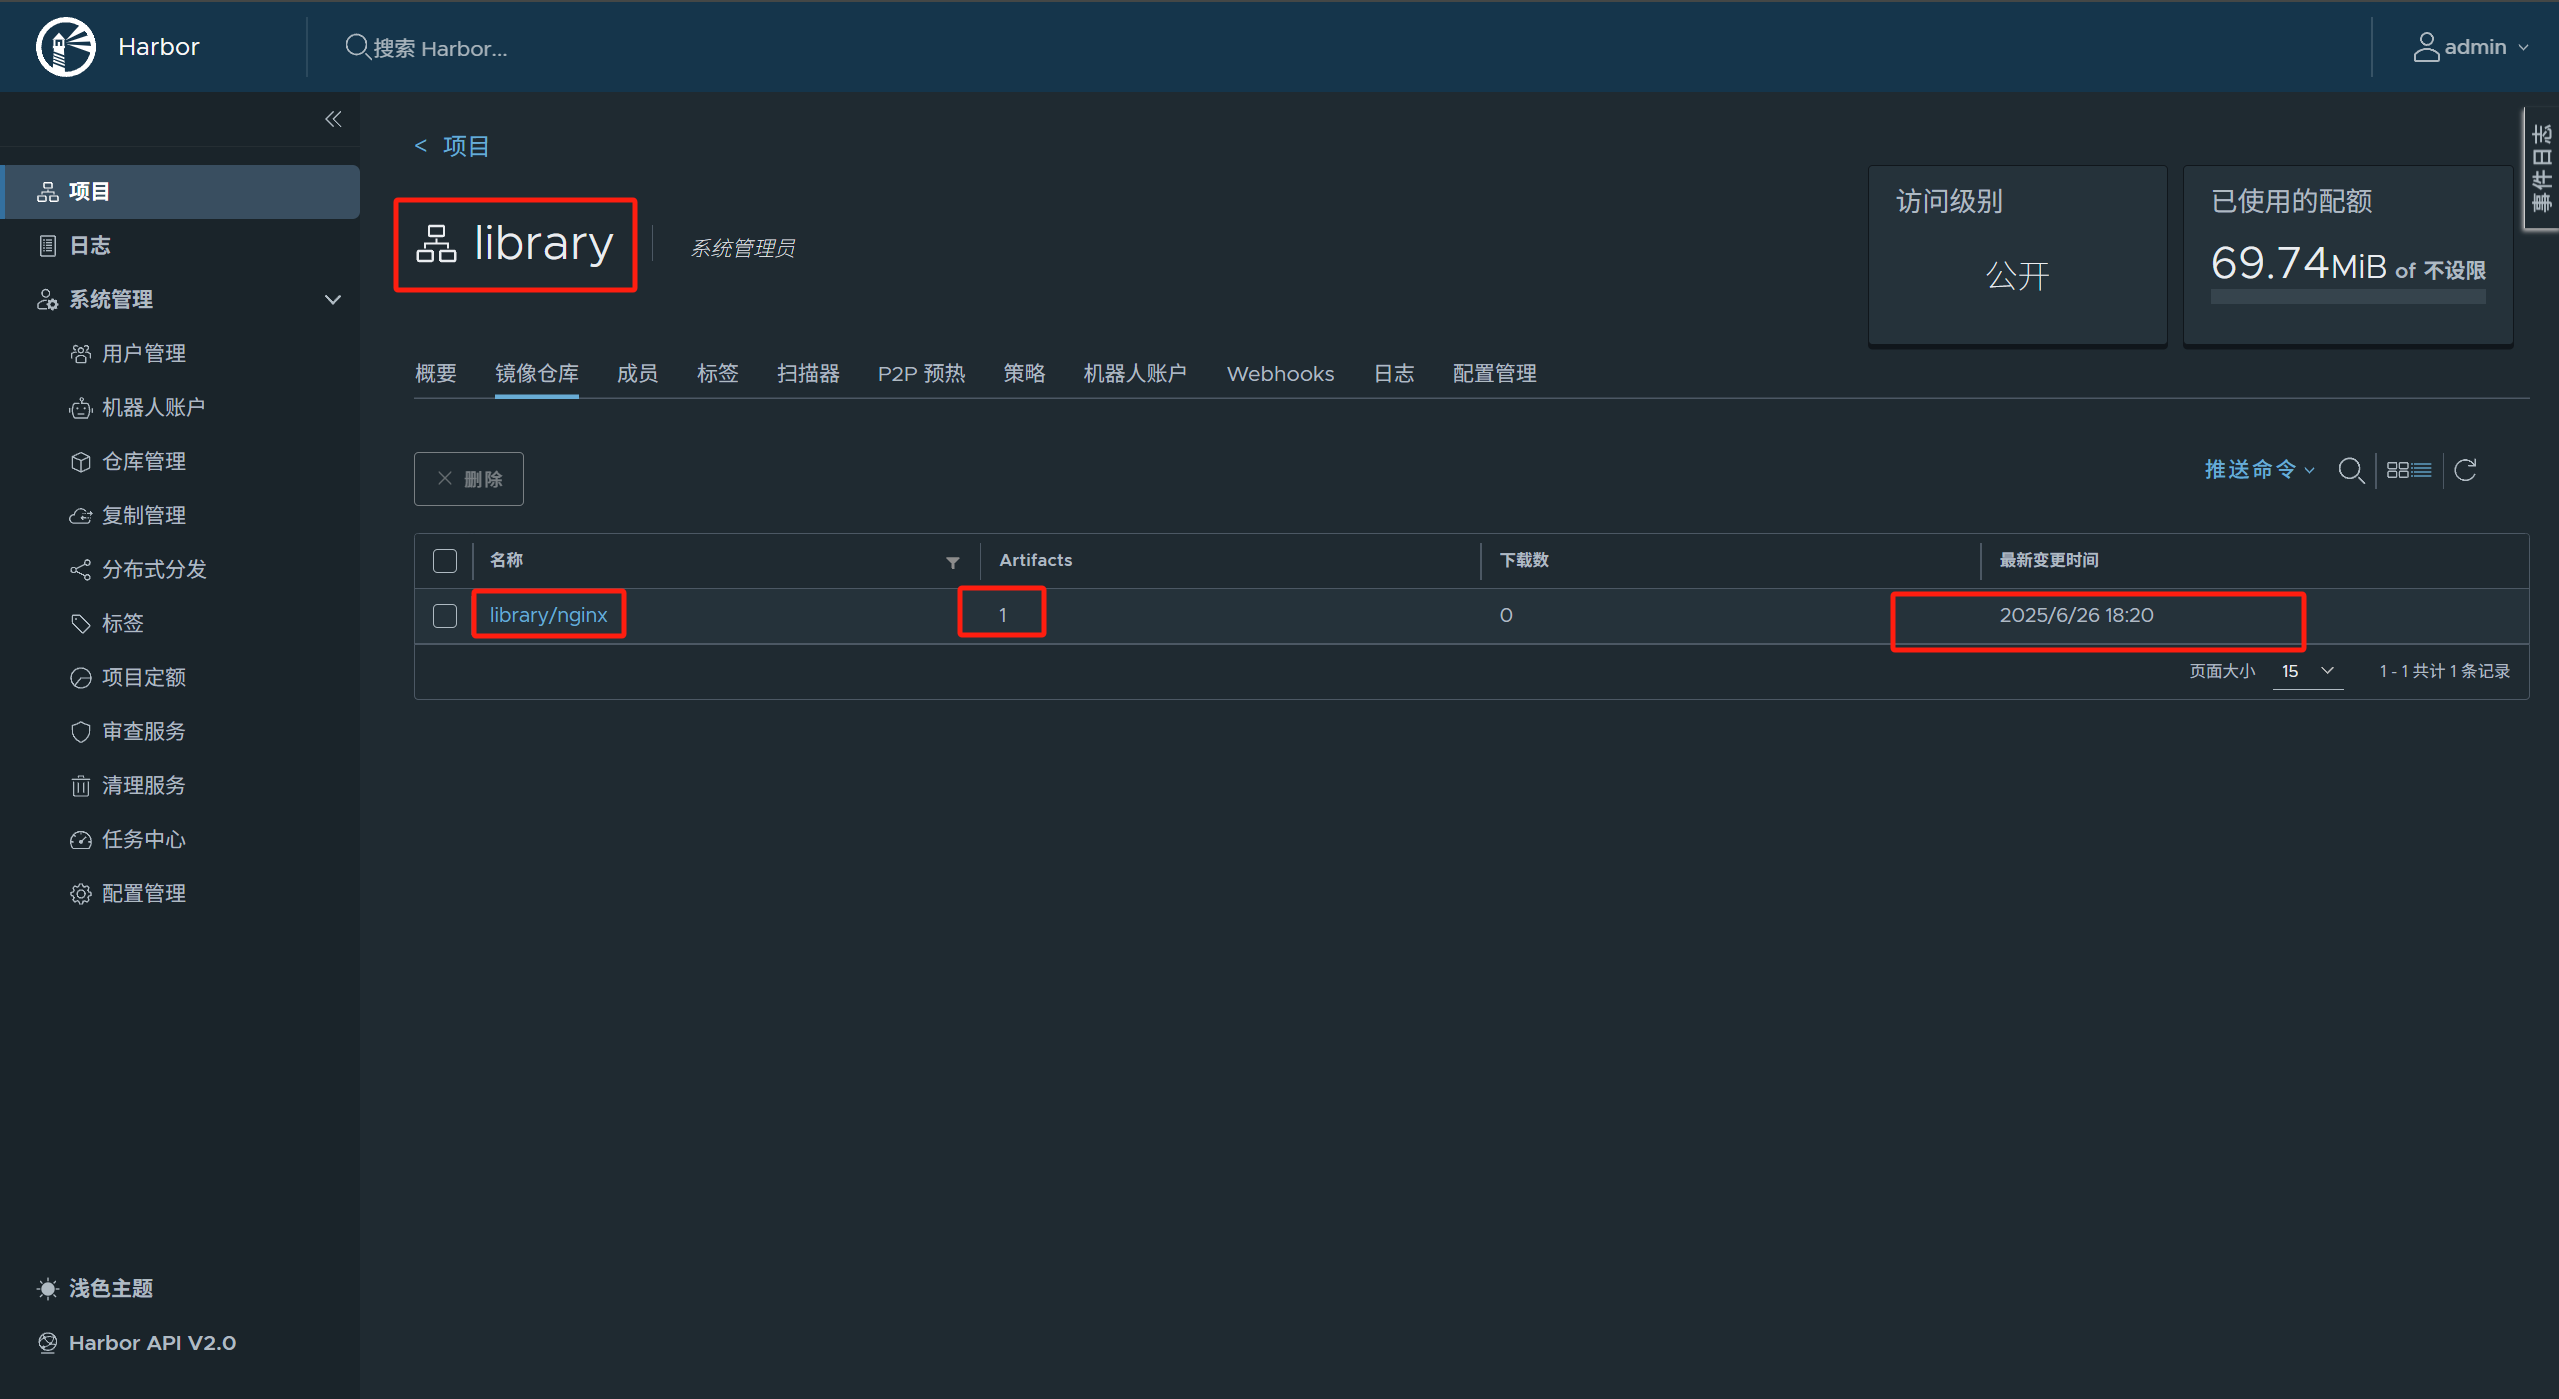
1 2 3 4 5 6 7 8 9 10 11 12 13 14 15 16 17 18 [root@localhost harbor]# docker tag docker.m.daocloud.io/nginx:latest reg.liweihu.cn/library/nginx:1.2 [root@reg ~]# docker login -u admin -p admin reg.liweihu.cn WARNING! Using --password via the CLI is insecure. Use --password-stdin. Login Succeeded [root@liweihu docker]# docker push reg.liweihu.cn/library/nginx:1.2 The push refers to repository [reg.liweihu.cn/library/nginx] 79604f2021db: Pushed 7e893c1b6ee8: Pushed 463308bed0c9: Pushed 4197a611afec: Pushed 3e96162769d5: Pushed 892e805f6f4f: Pushed 626ab8a5d57b: Pushed 7fb72a7d1a8e: Pushed 1.2: digest: sha256:5eca17f8607d18e0e0059bb6ae5c7cf3627e472a2b14e2a4b1e2011551377286 size: 1986
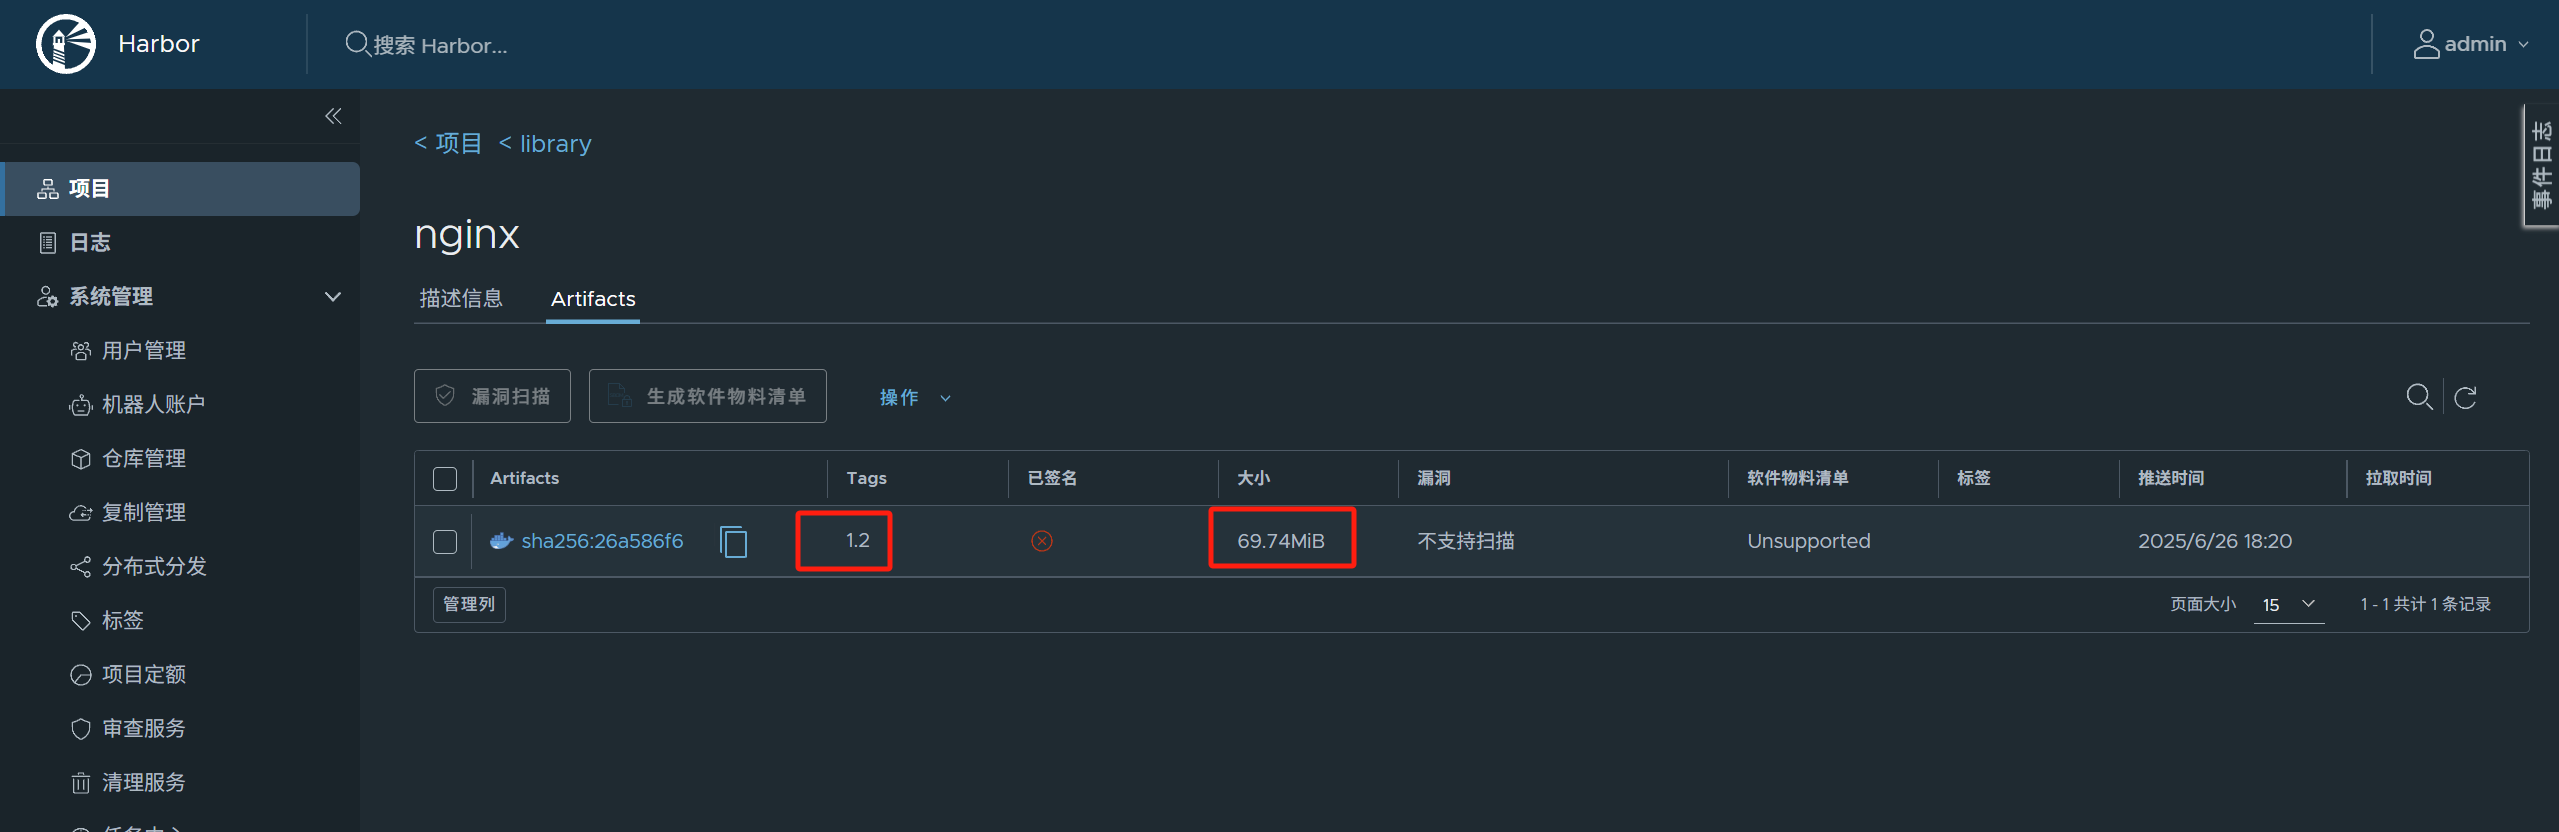
此时就可以再UI界面查看到我们上传的nginx镜像已经上来了,里面有一个版本号为1.2。
容器的资源配额 服务在运行的时候都是依赖内存、磁盘、I/O,那么我们通过docker run命令创建的容器他是一个完全隔离的一个环境,那么他的资源又是从何而来,每个容器的配额又是多少?
通过创建两个容器查看他的资源情况:
1 2 3 4 5 6 7 8 9 10 11 12 13 14 15 [root@reg ~]# docker run -d --name job-01 reg.liweihu.cn/library/nginx:1.2 5416634d099c26bf9e8468b15b2c5aa5845a980244d706a92e7656c47a93dfa0 [root@reg ~]# docker run -d --name job-02 reg.liweihu.cn/library/nginx:1.2 88566e4d11c95a99289f331b0142cf175b75600a330e17c565c10be65261b23b [root@reg ~]# docker exec -it job-01 grep MemTotal /proc/meminfo MemTotal: 7836684 kB [root@reg ~]# [root@reg ~]# docker exec -it job-02 grep MemTotal /proc/meminfo MemTotal: 7836684 kB [root@reg ~]# grep MemTotal /proc/meminfo MemTotal: 7836684 kB
同时实验结论得出,每个容器的内存量全部等于物理宿主机的内存总量,这意味容器的资源都是共享着宿主机的资源,有着更好的性能,同时资源能得到更大的利用,但着也意味着业务量一旦急剧上升,可能会发生资源争抢的情况。
容器内存限额 这是我们要在规划时要提前规避的,可以使用-m或者–memory分配内存限额。
1 2 3 4 5 [root@reg stress-1.0.4]# docker run -d --name job-03 --memory 500M reg.liweihu.cn/library/nginx:1.2 [root@reg stress-1.0.4]# docker inspect job-03 | grep Memory "Memory" : 524288000
之后可以利用了解dockerfile制作一个带有stress服务的镜像进行压力测试,例如:-m限额500M,stress服务压力给到700M,超出后服务会异常宕机。
1 docker run -it --name=job-04 -m 500M progrium/stress \--vm 1 --vm-bytes 700M
容器CPU限额 默认情况下,所有的容器有使用相同的CPU资源,并且没有任何限制,这和内存是一样的,一但业务上升同样会引起CPU资源争抢,但和内存不同,CPU是通过指定相对权重值来进行配额的。
使用–cpu-shares参数队CPU进行配额,默认情况下这个值是1024。
注意:当前容器中的业务空闲时,其他的容器有权力使用其空闲的CPU,这将确保业务的性能。
1 2 [root@reg stress-1.0.4]# docker run -d --name cpu-1 --cpu-shares 1024 reg.liweihu.cn/library/nginx:1.2 de4ba33171bc5307e9e849db71517a1eea62395027de47e4b6e1dbfdb16c992c
总结:CPU限额的分配,只有在宿主机资源不足的时候才会生效,并且是根据进程不同的优先级进行的,当其他容器空闲时,忙碌的容器可以获得全部可用CPU资源。
管理容器的I/O配额 默认情况下,所有的容器都可以使用相同的I/O资源(500权重),并且没有任何限制,这和内存、CPU一样,一但I/O需求上升,磁盘读写会变得非常迟钝,为了更好的提供服务,我们也要对容器使用硬盘方面进行配置。
1 2 3 4 5 6 7 8 9 10 11 12 13 14 15 16 17 18 19 20 21 22 23 24 25 26 27 28 29 [root@reg stress-1.0.4]# docker run -d --name 300io --blkio-weight 300 reg.liweihu.cn/library/nginx:1.2 ddb0a8ed6abaecde19cacd8c7b905a2f767ced5afab9aa80403659f1d165c183 [root@reg stress-1.0.4]# docker run -d --name 600io --blkio-weight 600 reg.liweihu.cn/library/nginx:1.2 41d1c2e6c06aef694adb48975a4485d050c38e92aeb366c070ed39d4a9f80639 [root@reg stress-1.0.4]# docker exec -it 600io /bin/bash root@41d1c2e6c06a:/usr/local# time dd if =/dev/zero of=test.out bs=1M count=1024 1024+0 records in 1024+0 records out 1073741824 bytes (1.1 GB, 1.0 GiB) copied, 9.94961 s, 108 MB/s real 0m9.965s user 0m0.000s sys 0m9.789s root@41d1c2e6c06a:/usr/local# exit [root@reg stress-1.0.4]# docker exec -it 300io /bin/bash root@ddb0a8ed6aba:/# time dd if =/dev/zero of=test.out bs=1M count=1024 1024+0 records in 1024+0 records out 1073741824 bytes (1.1 GB, 1.0 GiB) copied, 10.4424 s, 103 MB/s real 0m10.445s user 0m0.001s sys 0m10.270s root@ddb0a8ed6aba:/#
容器网络 docker run -it m.daocloud.io/docker.io/library/busybox:latest
使用上述命令创建一个容器,尝试ping百度,发现我们在创建容器时并没有添加网卡,也没有设置IP地址,也没有路由,但是我们Ping操作是如何实现的?
1 2 3 4 5 [root@reg stress-1.0.4]# docker run -it m.daocloud.io/docker.io/library/busybox:latest / PING www.baidu.com (157.148.69.151): 56 data bytes 64 bytes from 157.148.69.151: seq =0 ttl=127 time =254.003 ms 64 bytes from 157.148.69.151: seq =1 ttl=127 time =46.644 ms
容器原生网络 docker原生提供了以下几种网络类型,如果我们对原生网络不满意,我们还可与创建自定义网络。
原生网络分为:none、bridge、host,这些网络在docker安装的时候会自动创建,我们可用通过以下命令来查看。
1 2 3 4 5 6 [root@reg stress-1.0.4]# docker network ls NETWORK ID NAME DRIVER SCOPE 9b51f9051068 bridge bridge local 745d3d625feb harbor_harbor bridge local df38c270ec3c host host local 874b65d17e40 none null local
bridge网络
docker容器默认使用的网络类型,可以通过–network=bridge在创建容器时指定。他拥有独立的IP,同时也可以与外部进行通信,那是因为每个容器都会连接到一个内部网络的私有网桥,在安装docker的时候,他会自动为您的生成一个docker0的网桥,通过这个网桥使得内部网络与外部网络进行通信。
我们通过示例来理解一下bridge网络,首先我们先在宿主机上查看docker0虚拟网桥的ip段,是与宿主机不同的,这里我们先记住这个ip段:
1 2 3 4 5 6 7 8 9 [root@reg ~]# ip a s ...忽略... 4: docker0: <BROADCAST,MULTICAST,UP,LOWER_UP> mtu 1500 qdisc noqueue state UP group default link /ether 42:25:74:09:22:66 brd ff:ff:ff:ff:ff:ff inet 172.17.0.1/16 brd 172.17.255.255 scope global docker0 valid_lft forever preferred_lft forever inet6 fe80::4025:74ff:fe09:2266/64 scope link valid_lft forever preferred_lft forever ...忽略...
随后创建一个网络类型为bridge的容器,并进入容器,同样查看他的网卡信息,除了一个lo回环地址外,他还有一个eth0的网卡,这个ip段与上面宿主机查的docker0虚拟网桥的ip段是同一个网段的,最后在容器内ping百度也是正常通信的。
结合以下结论可得出,bridge类型的容器,他使用的是docker0虚拟网桥生成出来的IP段,并将这个接口连接到虚拟桥接上,docker的桥接网络通常使用NAT(网络地址转换)来连接到物理网络,使得容器能够通过宿主机IP地址访问外部网络。
1 2 3 4 5 6 7 8 9 10 11 12 13 14 15 16 17 18 19 20 21 22 23 24 25 [root@reg ~]# docker run -it --network=bridge m.daocloud.io/docker.io/library/busybox:latest /bin/sh / 1: lo: <LOOPBACK,UP,LOWER_UP> mtu 65536 qdisc noqueue qlen 1000 link /loopback 00:00:00:00:00:00 brd 00:00:00:00:00:00 inet 127.0.0.1/8 scope host lo valid_lft forever preferred_lft forever inet6 ::1/128 scope host valid_lft forever preferred_lft forever 2: eth0@if18: <BROADCAST,MULTICAST,UP,LOWER_UP,M-DOWN> mtu 1500 qdisc noqueue link /ether 8a:95:50:50:79:0f brd ff:ff:ff:ff:ff:ff inet 172.17.0.2/16 brd 172.17.255.255 scope global eth0 valid_lft forever preferred_lft forever / PING www.baidu.com (183.240.99.169): 56 data bytes 64 bytes from 183.240.99.169: seq =0 ttl=127 time =40.259 ms ^C --- www.baidu.com ping statistics --- 1 packets transmitted, 1 packets received, 0% packet loss round-trip min/avg/max = 40.259/40.259/40.259 ms /
none网络
如果容器使用的是none网络,那么此容器将不再具备网卡,只具备lo网络,如果要使用这个网络,在创建容器时需要指定–network=none即可。
对一些安全要求较高且不需要外部通信的场景可以使用none网络,使得数据更加私密,例如日志服务只需要通过卷的方式,往服务器中写入数据。
创建一个none网络类型的容器,并进入该容器查看容器网卡,发现none类型他是没有任何网卡的,只有一个lo回环网络,通过ping发现他是不能与外部进行通信的。
结论得出,none他是一个绝对私密的一个容器网络,所有在数据需要极高安全并且不需要进行外部通信,则可以使用none网络类型。
1 2 3 4 5 6 7 8 9 10 11 [root@reg ~]# docker run -it --network=none m.daocloud.io/docker.io/library/busybox:latest /bin/sh / 1: lo: <LOOPBACK,UP,LOWER_UP> mtu 65536 qdisc noqueue qlen 1000 link /loopback 00:00:00:00:00:00 brd 00:00:00:00:00:00 inet 127.0.0.1/8 scope host lo valid_lft forever preferred_lft forever inet6 ::1/128 scope host valid_lft forever preferred_lft forever / ping: bad address 'www.baidu.com'
host网络
Host网络是一个共享宿主机网络的一个容器共享网络,可以通过–network=host在创建容器时指定host网络,处于host网络模式的容器,网络配置和宿主机完全一样,也就是说在容器中可以看到宿主机的所有网卡,并且主机名也是宿主机的,他们共用同一个IP网络,这最大的好处就是性能很高,传输效率好,但是宿主机上已经使用的端口,容器是不可以重复使用的,同样容器使用了的端口,宿主机也是不可以使用的。
创建一个host网络类型的容器,并进入容器,查看容器ip后发现,拉出了很多数据,这些数据与宿主机的IP一摸一样,并且容器内也是可以访问外部网络的。
由此得出结论,host是直接与宿主机共享了网络,你的IP以及你所使用的端口都会直接使用到宿主机的网络,同时不存在NAT转换,所以他的网络速率要比桥接更快。
1 2 3 4 5 6 7 8 9 10 11 12 13 14 15 16 17 [root@reg ~]# docker run -it --network=host m.daocloud.io/docker.io/library/busybox:latest /bin/sh / ....忽略.... 2: ens160: <BROADCAST,MULTICAST,UP,LOWER_UP> mtu 1500 qdisc mq qlen 1000 link /ether 00:0c:29:cd :fb:4c brd ff:ff:ff:ff:ff:ff inet 192.168.8.135/24 brd 192.168.8.255 scope global noprefixroute ens160 valid_lft forever preferred_lft forever inet6 fe80::20c:29ff:fecd:fb4c/64 scope link noprefixroute ....忽略.... 4: docker0: <NO-CARRIER,BROADCAST,MULTICAST,UP> mtu 1500 qdisc noqueue link /ether 42:25:74:09:22:66 brd ff:ff:ff:ff:ff:ff inet 172.17.0.1/16 brd 172.17.255.255 scope global ....忽略.... / PING www.baidu.com (157.148.69.151): 56 data bytes 64 bytes from 157.148.69.151: seq =0 ttl=128 time =41.224 ms
Docker网络端口映射 我们上述了解完docker的网络,都是针对容器如何进行外部的访问,那么假设我的容器是个nginx服务,我外部需要访问容器内的服务,那么我该怎么做。
创建好nginx容器后,我们ps发现它只有一个容器内部的80端口存在,我们也不知道它的ip是多少,随后我们进入容器发现ip a s查看ip的命令也没有,我们无从得知它的ip,即使我们就算得知它的ip,我们客户端也不可能访问到容器内部的ip,而且容器的IP是随机的,每次重启容器都会随机生成一个内部的虚拟IP或没有IP,但是我们容器内访问这个80端口是能访问到nginx服务是正常的,所以即使我们创建出来了容器,但是满足不了我们实际业务中,客户端要访问这个服务的需求。
1 2 3 4 5 6 7 8 9 10 11 12 13 14 [root@reg ~]# docker run -d --name nginx-01 docker.m.daocloud.io/nginx:latest 9c8de73f0c70f832dc2d7925c32b4fde6f267f82edc077f4878612976818ea04 [root@reg ~]# docker ps CONTAINER ID IMAGE COMMAND CREATED STATUS PORTS NAMES 9c8de73f0c70 docker.m.daocloud.io/nginx:latest "/docker-entrypoint.…" 18 seconds ago Up 17 seconds 80/tcp nginx-01 [root@reg ~]# docker exec -it nginx-01 /bin/bash root@9c8de73f0c70:/# ip a s bash: ip: command not found root@9c8de73f0c70:/# curl 127.0.0.1 80 <!DOCTYPE html> <html> <head> <title>Welcome to nginx!</title> ....忽略....
对于这类情况,我们就要介绍到端口映射的内容,对于需要客户端访问的服务,我们可以将容器的端口通过映射的方式转到我们宿主机的某一指定端口,客户端即可直接访问固定的宿主机IP+映射端口访问到我们的容器服务。
选项说明:
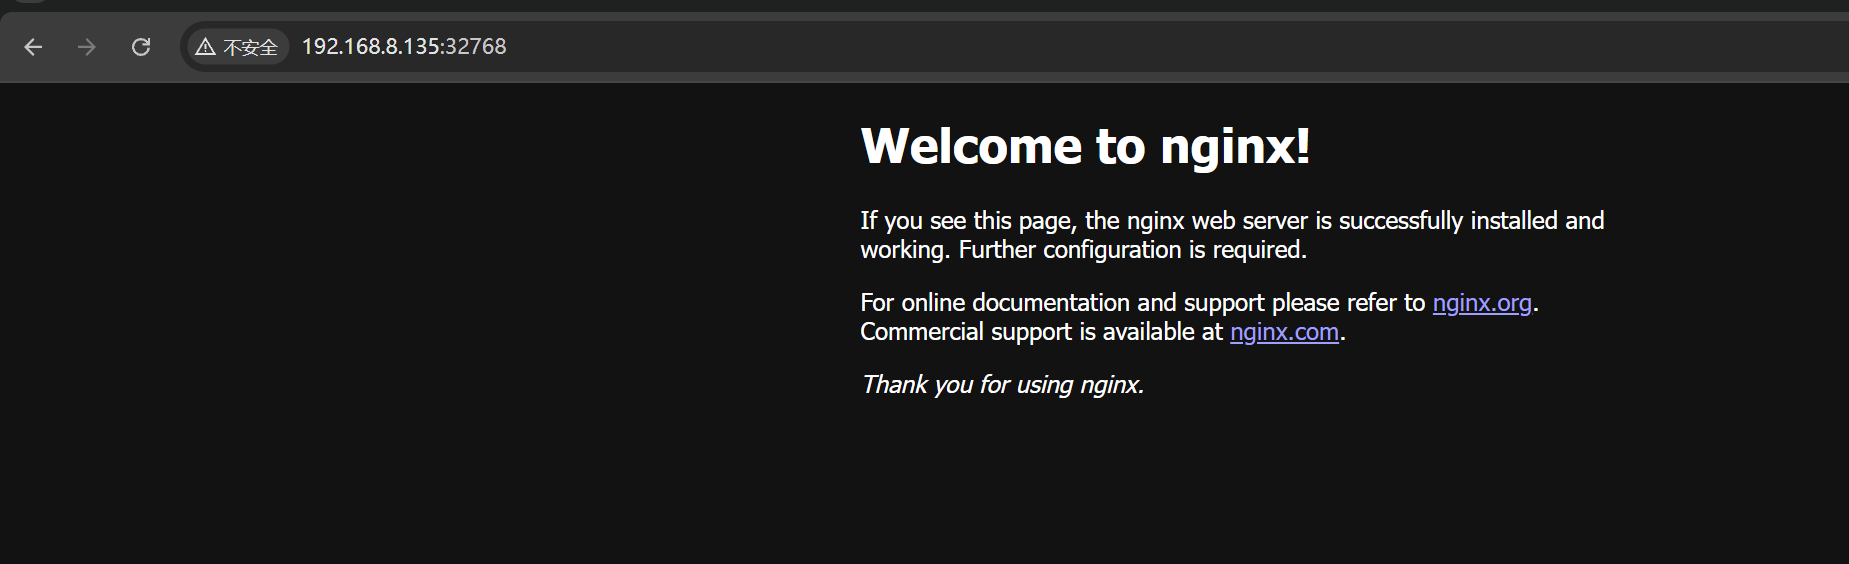
1 2 3 4 5 6 7 8 [root@reg ~]# docker run -d -P --name nginx-02 docker.m.daocloud.io/nginx:latest 6bc39954ad93248b160b9f059ca6d824b2285fdce530a1e964c89beab3a52439 [root@reg ~]# [root@reg ~]# [root@reg ~]# docker ps CONTAINER ID IMAGE COMMAND CREATED STATUS PORTS NAMES 6bc39954ad93 docker.m.daocloud.io/nginx:latest "/docker-entrypoint.…" 9 seconds ago Up 8 seconds 0.0.0.0:32768->80/tcp, [::]:32768->80/tcp nginx-02
使用浏览器访问宿主机IP+端口,验证通过。
以下示例使用-p(小写)创建一个nginx容器服务,它会根据您指定的端口进行映射,指定81端口映射到容器中的80端口。
1 2 3 4 5 [root@reg ~]# docker run -d -p 81:80 --name nginx-03 docker.m.daocloud.io/nginx:latest 600d76d166900138f9ddc0ca6d46bbee48b7965992ab171bf161749ce93b1cc3 [root@reg ~]# docker ps CONTAINER ID IMAGE COMMAND CREATED STATUS PORTS NAMES 600d76d16690 docker.m.daocloud.io/nginx:latest "/docker-entrypoint.…" 3 seconds ago Up 2 seconds 0.0.0.0:81->80/tcp, [::]:81->80/tcp nginx-03
使用浏览器访问宿主机IP+端口,验证通过。
配置容器DNS 配置容器的DNS可在宿主机的/etc/docker/daemon.json文件中增加所有容器默认的DNS,在该文件中增加dns参数,重启docker后生效,之后所有的容器默认都有拥有这两个dns。
1 2 3 4 5 6 7 8 9 10 11 12 [root@liweihu docker]# cat > /etc/docker/daemon.json << EOF { "registry-mirrors": [ "https://docker.m.daocloud.io" ], "exec-opts": ["native.cgroupdriver=systemd"], "insecure-registries": ["reg.liweihu.cn"], "dns": ["114.114.114.114","8.8.8.8"] } EOF [root@reg ~]# systemctl daemon-reload [root@reg ~]# systemctl restart docker.service
创建一个容器,执行cat查看容器内的etc/resolv.conf文件,验证通过,容器内的dns配置文件默认dns为配置的dns。
1 2 3 4 5 6 7 8 9 10 11 [root@reg ~]# docker run --name dns-1 m.daocloud.io/docker.io/library/busybox:latest cat /etc/resolv.conf nameserver 114.114.114.114 nameserver 8.8.8.8 search liweihu.cn
如有容器需要指定特殊的dns,则可以在创建容器时使用–dns选项进行指定。
-dns:为该容器指定一个dns。
-dns-search:为该容器指定一个dns搜索域,搜索域设置为test.com,请求的域名为example时,系统会将其补全为example.test.com
-h:为该容器设置主机名
1 2 3 4 5 6 7 8 9 10 [root@reg ~]# docker run --name dns-2 --dns 2.2.2.2 --dns-search test.com -h test-dns m.daocloud.io/docker.io/library/busybox:latest cat /etc/resolv.conf nameserver 2.2.2.2 search test.com
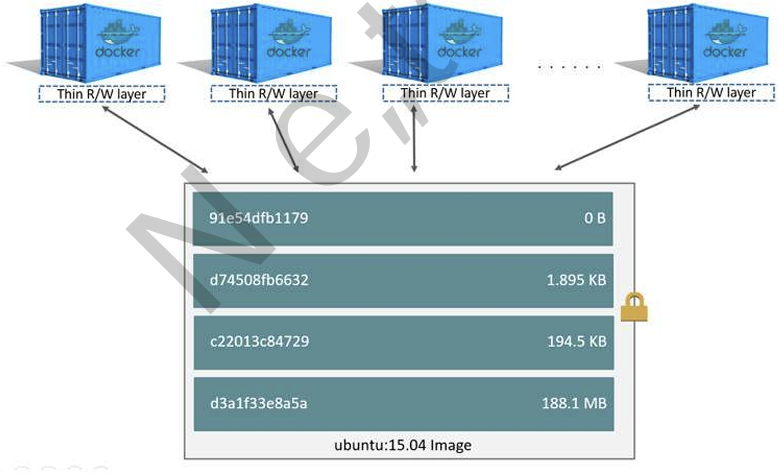
容器数据卷 容器和层 容器和镜像最大的不同在于最顶部的可写层,所有在容器中的数据写入和修改都会直接存储到这个可写层,这就意味着当容器被删除,可写层中的数据就丢失了,虽然每个容器都有自己不同的可写层,但是容器底层的镜像却是可以同时共享的,
Copy-on-write策略
操作
具体执行
创建文件 新文件只能被添加在容器层中
删除文件 依据容器分层结构由上往下依次查找。找到后,在容器层中记录该删除操作。具体实现是,UnionFS会在容器层创建一个“whiteout”文件,将被删除的文件“遮挡”起来
修改文件 依据容器分层结构由上往下依次查找。找到后,镜像层中的数据复制到容器层进行修改,修改后的数据保存在容器层中。
读取文件 依据容器分层结构由上往下依次查找。
容器数据管理-Volume 如果我们要使用Volume卷挂在的方式来进行容器数据的管理,我们可以使用-v的选项。这样我们将容器内的数据文件映射到宿主机,通过宿主机来管理如容器内的配置文件。
参数说明:
创建一个容器,将容器内的/usr/share/nginx/html/“目录做成卷的方式进行管理,查看容器详细信息,发现该容器的数据类型为volume【卷】,卷的名字为【e38a7e9eb……】,该卷在宿主机中的【/var/lib/docker/volumes/e38a7…..】目录下进行管理,对应挂载了容器内的【”/usr/share/nginx/html”】目录
1 2 3 4 5 6 7 8 9 10 11 12 13 14 15 16 17 18 19 20 21 22 23 24 25 26 27 28 29 30 31 [root@reg ~]# docker run -d -v /usr/share/nginx/html/ -p 81:80 docker.m.daocloud.io/nginx:latest 53de2bd999b7cfb2a0b8411176d635462f5680ebf207d9dd838e3b5dead1a2f3 [root@reg ~]# docker inspect 53de2bd999b7 | grep -A 10 Mounts "Mounts" : [ { "Type" : "volume" , "Name" : "e38a7e9eb84c1f447ebab4f879c381cd0692b22ae84ef8bd08fe74e3241bb48d" , "Source" : "/var/lib/docker/volumes/e38a7e9eb84c1f447ebab4f879c381cd0692b22ae84ef8bd08fe74e3241bb48d/_data" , "Destination" : "/usr/share/nginx/html" , "Driver" : "local" , "Mode" : "" , "RW" : true , "Propagation" : "" } [root@reg ~]# docker volume ls | grep "e38a7e9eb84c1f447ebab4f879c381cd0692b22ae84ef8bd08fe74e3241bb48d" local e38a7e9eb84c1f447ebab4f879c381cd0692b22ae84ef8bd08fe74e3241bb48d[root@reg ~]# echo "这是一个lovume的容器卷实验" > /var/lib/docker/volumes/e38a7e9eb84c1f447ebab4f879c381cd0692b22ae84ef8bd08fe74e3241bb48d/_data/index.html [root@reg ~]# curl 127.0.0.1:81 这是一个lovume的容器卷实验 [root@reg ~]# docker rm 53de2bd999b7 --force 53de2bd999b7 [root@reg ~]# docker volume ls | grep "e38a7e9eb84c1f447ebab4f879c381cd0692b22ae84ef8bd08fe74e3241bb48d" local e38a7e9eb84c1f447ebab4f879c381cd0692b22ae84ef8bd08fe74e3241bb48d[root@reg _data]# cat /var/lib/docker/volumes/e38a7e9eb84c1f447ebab4f879c381cd0692b22ae84ef8bd08fe74e3241bb48d/_data/index.html 这是一个lovume的容器卷实验
但是大家会发现容器内的数据文件确认是挂载出来了,但是挂载出来到宿主机的这个目录实在是太长了,而且中间还是一串乱码,并且有过Linux基础的还会发现这个/var目录下的都是临时文件,容器关机不会引起数据丢失,但是如果服务器关机重启,数据文件还是一样会丢失,并不能完全满足业务中的持久化存储以及便利性。
数据管理-bind 为此我们可以使用更优解的方式,将指定的宿主机目录挂载到指定的指定的容器目录,互相mount绑定。
参数说明:
创建一个持久化的宿主机目录,然后创建容器并使用-v[宿主机目录]:[容器目录]将互相mount挂载,向宿主机目录写入文件已验证,查看容器详细信息可看到此刻绑定的卷类型为bind,以及他的宿主机源目录以及容器目标目录。
1 2 3 4 5 6 7 8 9 10 11 12 13 14 15 16 17 18 19 20 21 22 23 [root@reg _data]# mkdir /opt/nginx [root@reg ~]# docker run -d -v /opt/nginx:/usr/share/nginx/html/ -p 81:80 docker.m.daocloud.io/nginx:latest [root@reg opt]# echo "这是一个持久化mount的目录" > /opt/nginx/index.html [root@reg opt]# curl 127.0.0.1:81 这是一个持久化mount的目录 [root@reg opt]# docker inspect 5abc1cb9f4a5 | grep -A 10 Mounts "Mounts" : [ { "Type" : "bind" , "Source" : "/opt/nginx" , "Destination" : "/usr/share/nginx/html" , "Mode" : "" , "RW" : true , "Propagation" : "rprivate" } ], "Config" : {
心细的可以他发现volume和bind查看容器详细信息时有个区别,bind少了name卷名称的参数,没错bind是mount挂载的方式,他不会新生成卷,所以你即使docker volume发现他是没有生成卷的。
之前我们介绍的Harbor官方也是采用bind方式来持久化存储我们所有上传的镜像文件,不然我们上传的镜像只要关闭容器或者关闭宿主机,上传的镜像就会丢失,以下示例可以验证以下。
1 2 3 4 5 6 7 8 9 10 11 12 13 14 [root@reg opt]# docker inspect harbor-db | grep -A 10 Mounts "Mounts" : [ { "Type" : "bind" , "Source" : "/data/database" , "Destination" : "/var/lib/postgresql/data" , "Mode" : "rw,z" , "RW" : true , "Propagation" : "rprivate" } ], "Config" : {


 wechat
 alipay